
There’s a way to create your first VR app and it’s much quicker than you think
By Antoine RibordyCan you jump? Yes!
Can you dance? Yes!
Can you speak German? Yes!
She can do anything. My daughter is amazing! (She can’t speak German by the way).
Here’s the thing. When you believe you can do anything, you’ll try doing what you set your mind to. This is your default state when you’re young.
Then, as you go through failures in your life, you’ll revise your judgment. Until you start saying: “I can’t”.
I won’t try to convince you your potential is limitless. That’s not my goal here. But, try to suspend your judgment for a bit, while you read the next paragraph. Think, “I can do anything!”.
Here, I want to show you how you can create your first VR app in a couple of hours. This even if you don’t have any experience in programming, game engines or 3D modeling. I’m gonna help you make the jump to VR and join the select club of VR creators…
Deciding today to build your skills in VR could be a turning point in your whole career and life. It can change your outcome for years to come. But, only if you gather the courage to get started.
And here’s the good news. As you’ll see, the first steps are not as hard as you might think.
So, are you ready to take the challenge?
Let’s get started then.
Get your tools ready
Fair warning. There’s a good chunk of downloading ahead.
I suggest you get the downloads started and go do something else until they’ve completed. Or read the rest of the article to prepare for what’s coming, while you’re waiting.
First, download Unity 3D here. Get the personal version, which is free.
Then, get the relevant Google Cardboard SDK for Unity here.
Finally, depending on your phone, get XCode if you’re developing for iOS or Android Studio if you’re developing for Android.
Now, do you have a Google Cardboard, GearVR or equivalent? If not, you’ll have to get one if you want to experience mobile VR. You don’t need one to create your application per se, but to experience it in 3D.
If you want to build an iOS app, you’ll need to have a machine running MacOS. It’s the case for any iOS app, it’s not VR specific. Also you’ll need to create an Apple developer account. To get one, follow the instructions here.
You’ve got everything downloaded? Perfect. Now, install all the software. I’m sure you know how to do it.
Now you’ve got everything ready. Time to build your first app!
Your First App
Before we start, a quick note. I won’t be detailing the flow to build Android apps, since I don’t have an Android phone. I’ll only explain the process for iPhone.
But the flow for Android is very similar. You swap XCode for Android Studio and will have to tweak a few settings to build your app, but that’s about it.
You can get more information on how to build a VR app for Android in Unity here. Ok, we’re ready to move on.
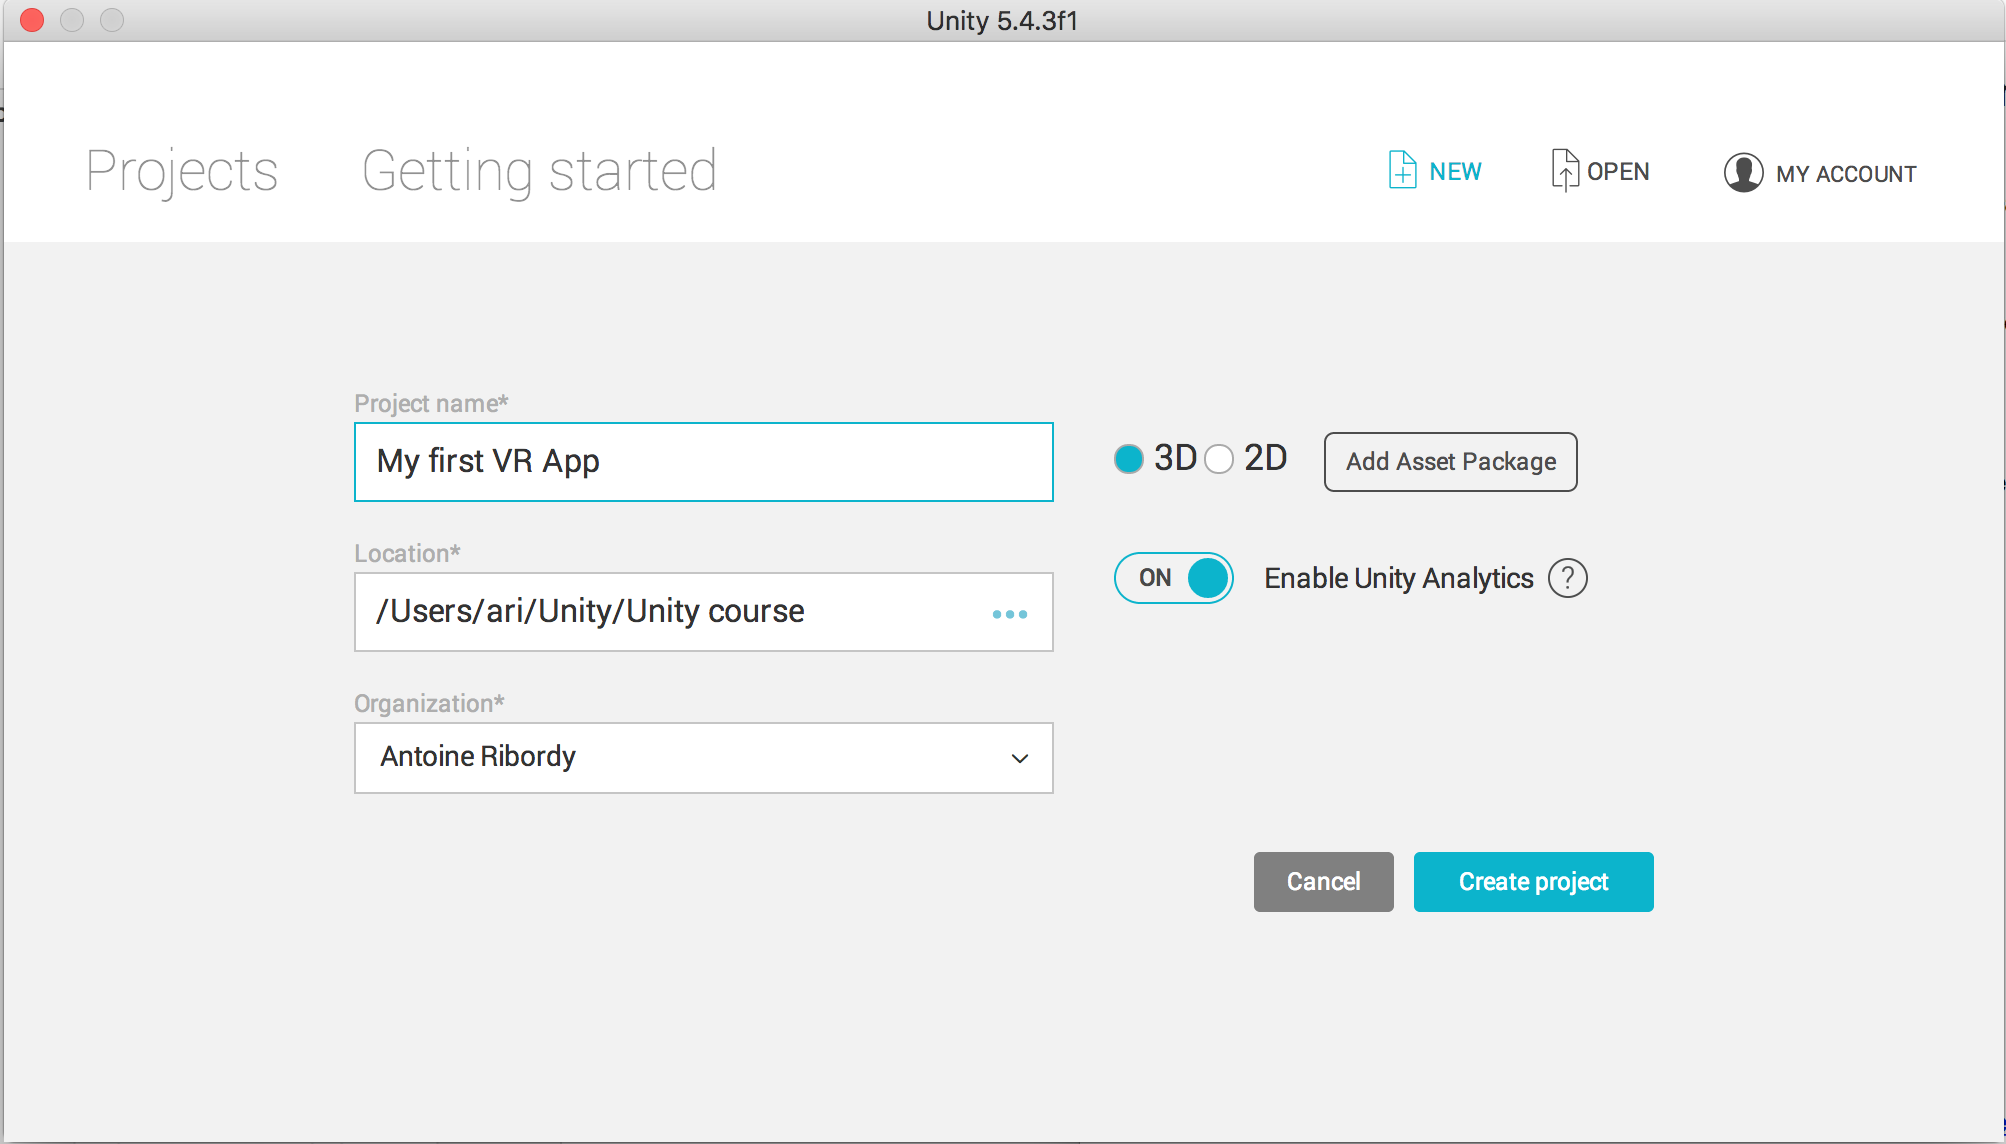
Open Unity. You’ll be greeted by a splash screen. Select Create New Project.
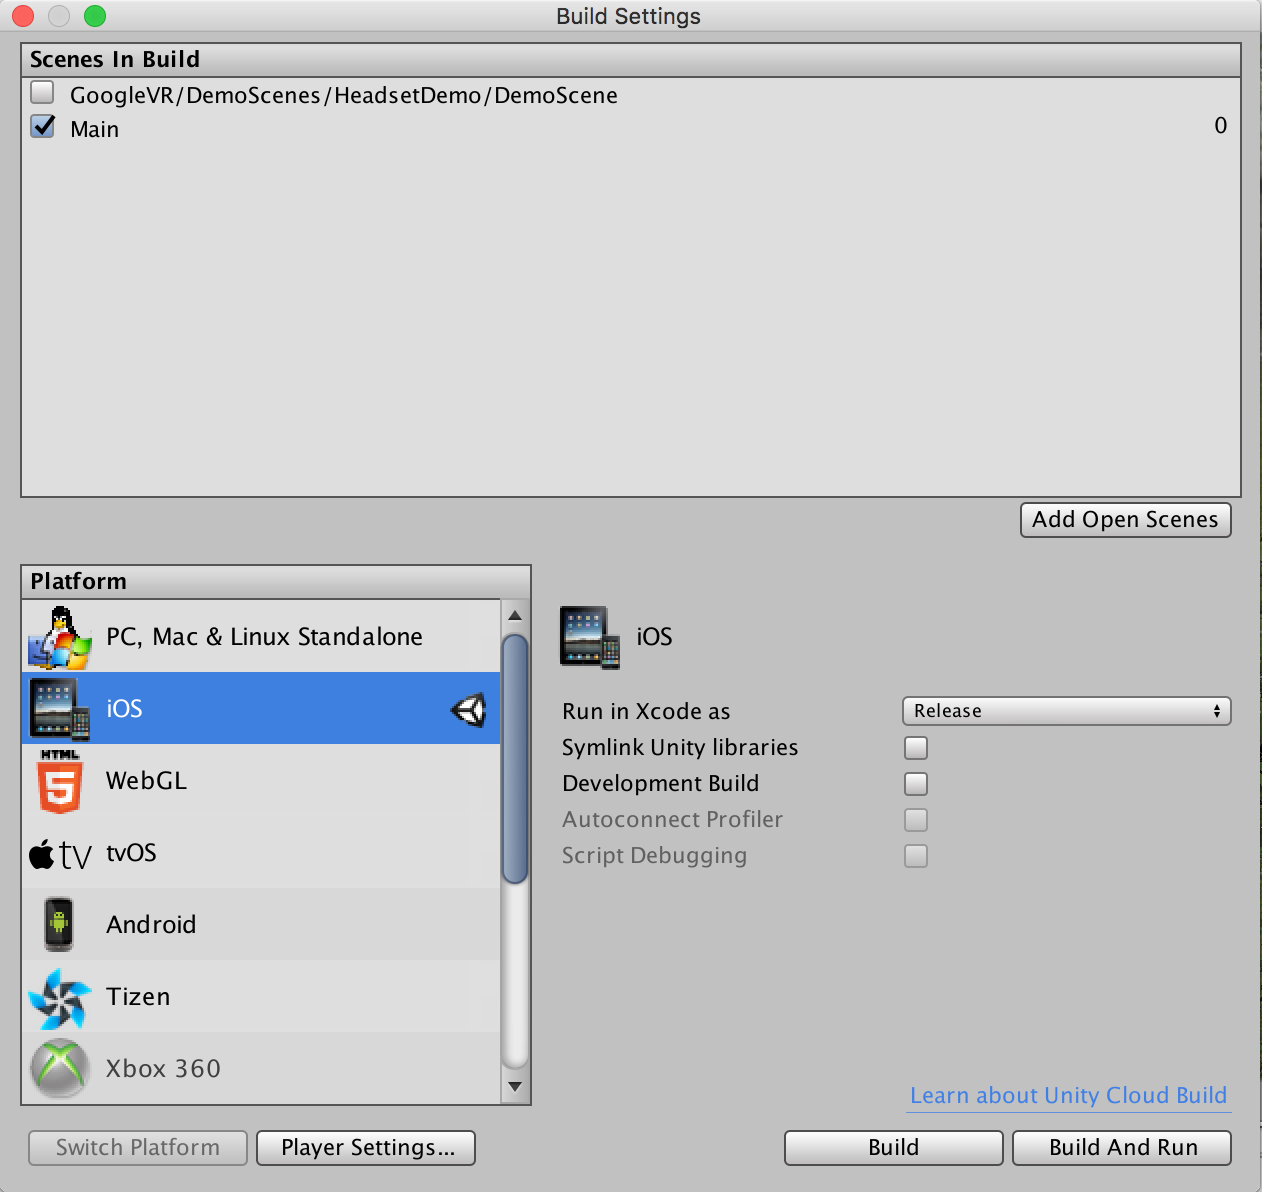
Once your project has loaded, choose File -> Build settings. Choose either iOS or Android, then click “Switch Platform”.
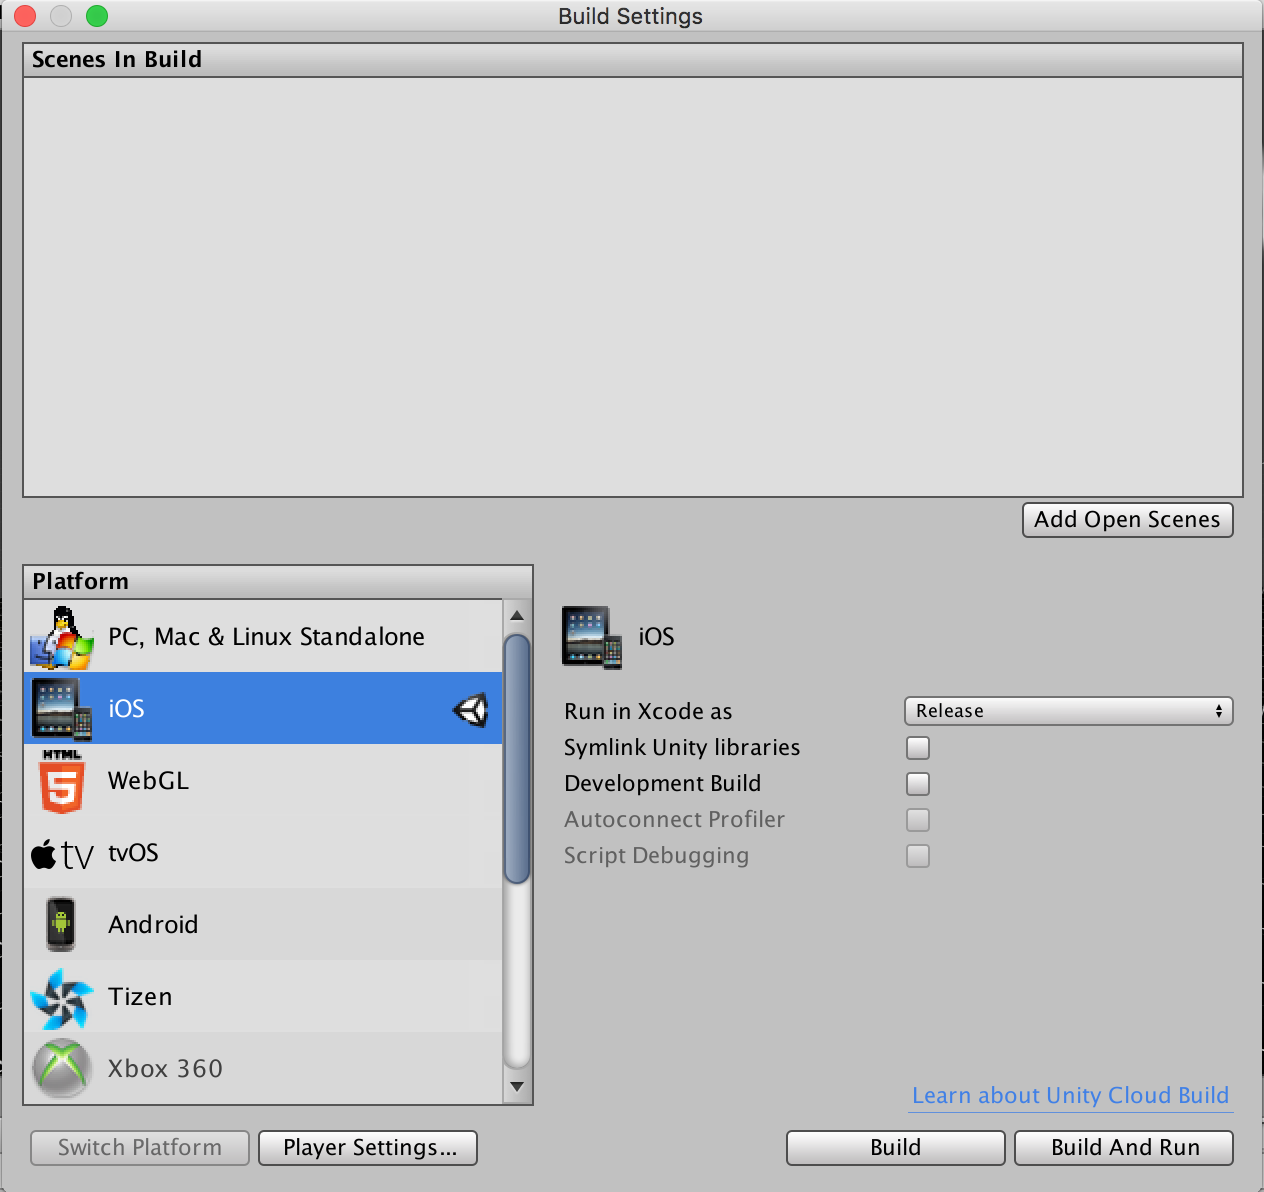
Click Player Settings. On the right hand side of the window, under Company Name, write down your name. And under Product Name, write My First VR App (or any other name you fancy for your first app).
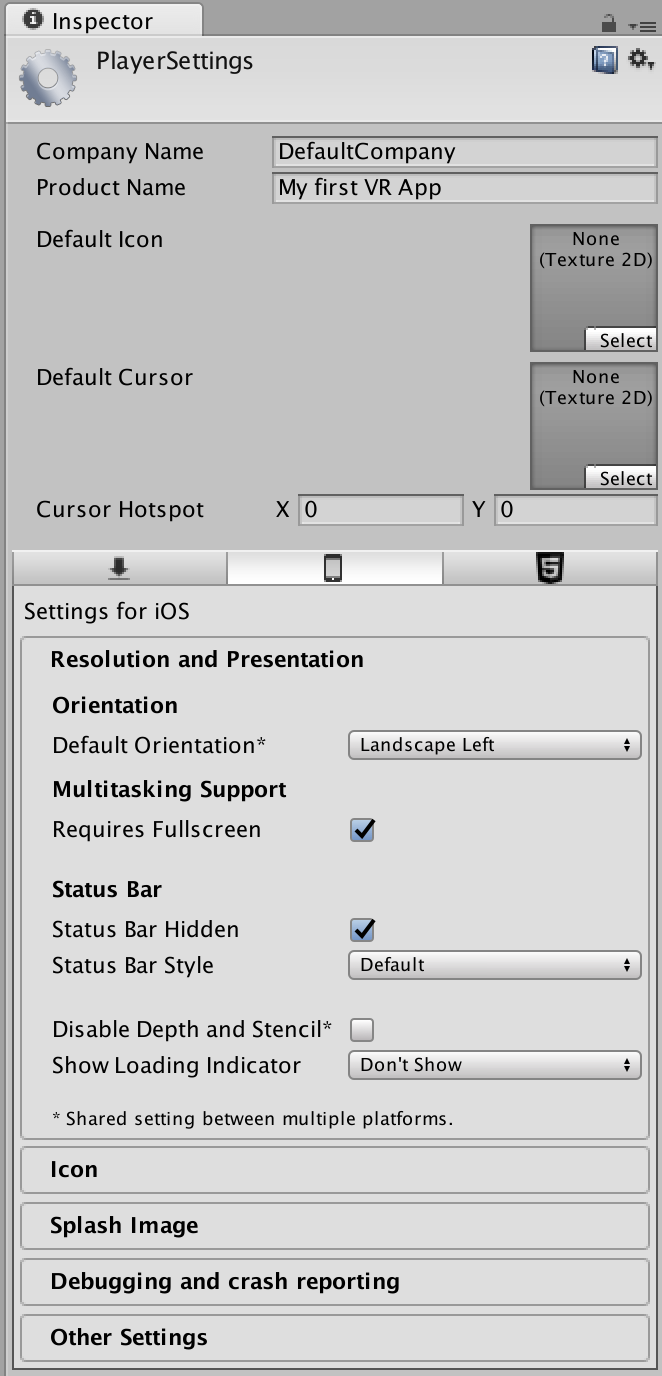
Then, click on Resolution and Presentation. Select “Default Orientation* : Landscape left”, as shown above.
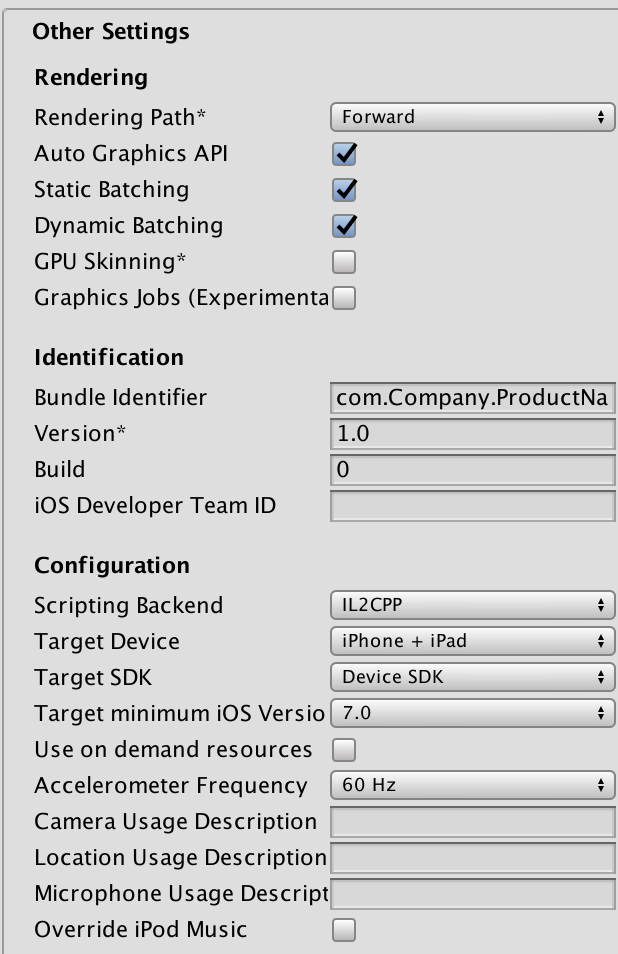
Now, click on Other Settings. Under Bundle Indentifier, change Company by your name and ProductName by MyFirstVRApp.
When you’re done, in the menus, choose Assets -> Import package -> Custom Package. Select the GoogleVRForUnity.unitypackage that you downloaded earlier (it’s the Google Cardboard SDK). A window will then pop-up, with the list of elements to import. Everything will be selected by default. Click Import.
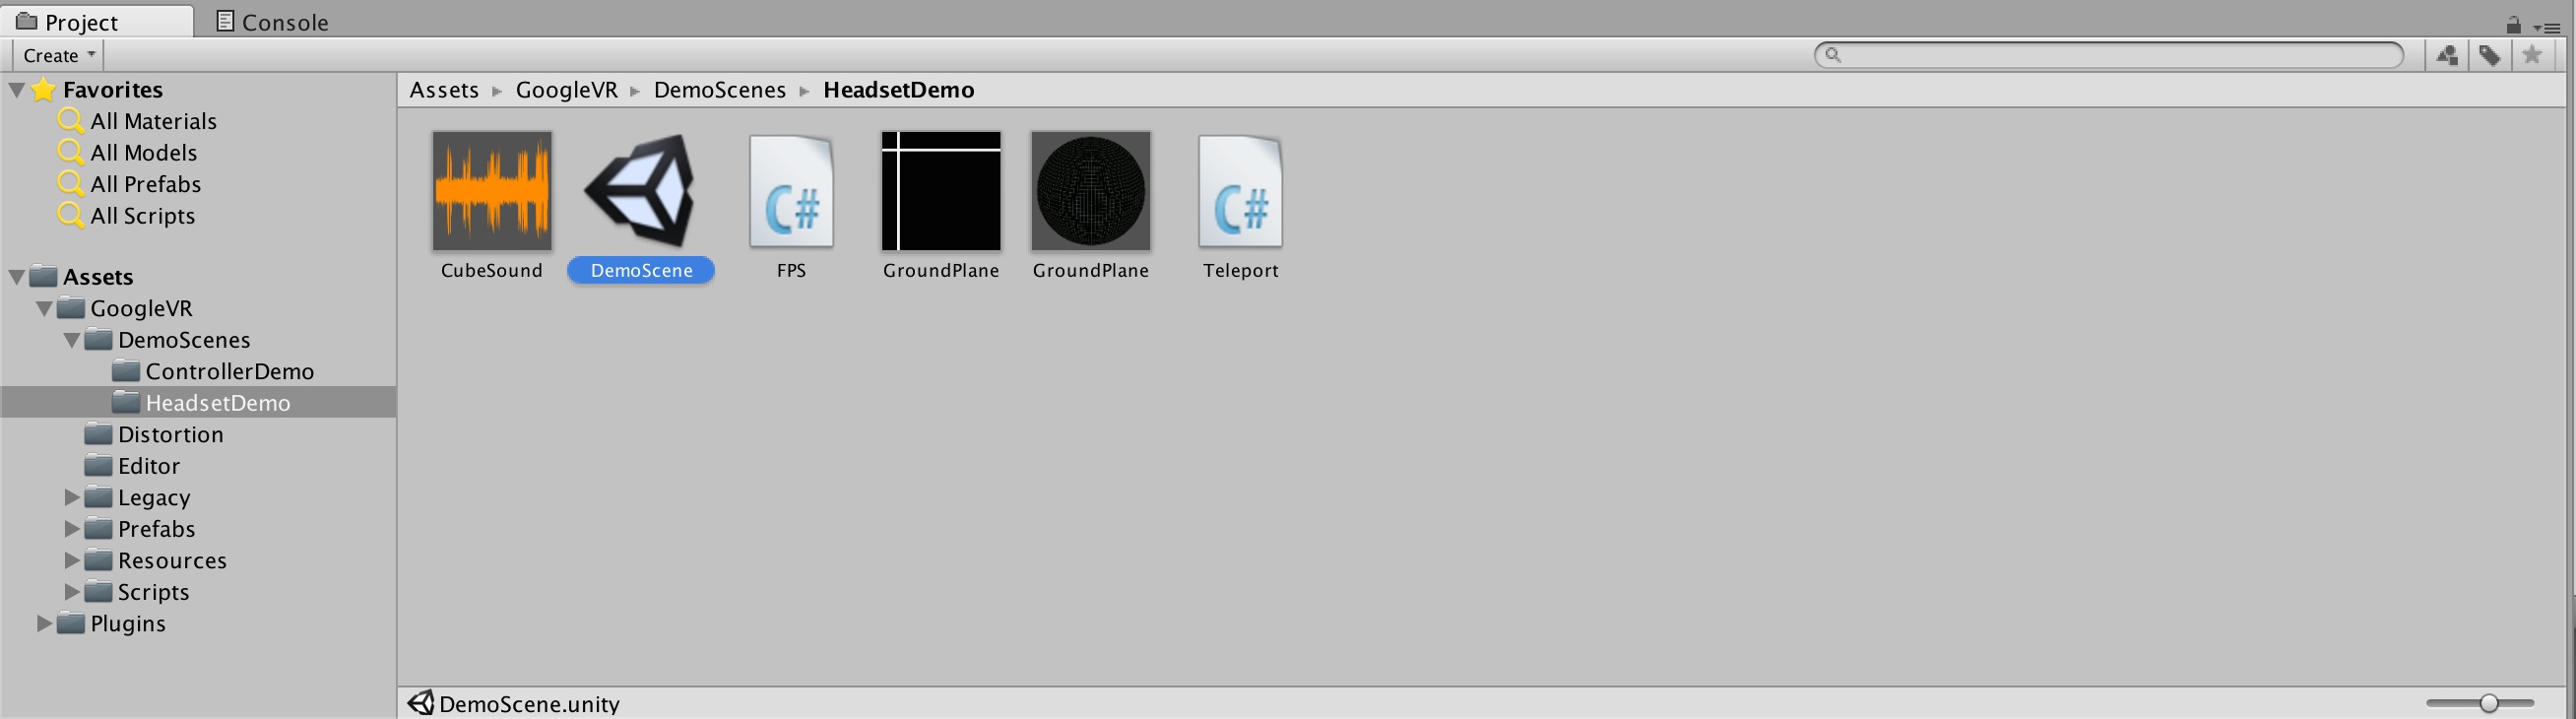
Now, in the bottom left hand corner you’ll notice a new GoogleVR folder in your Assets. Let’s open the Demo Scene Google created. Select Assets -> GoogleVR -> DemoScenes -> HeadsetDemo -> DemoScene. Double click on it.
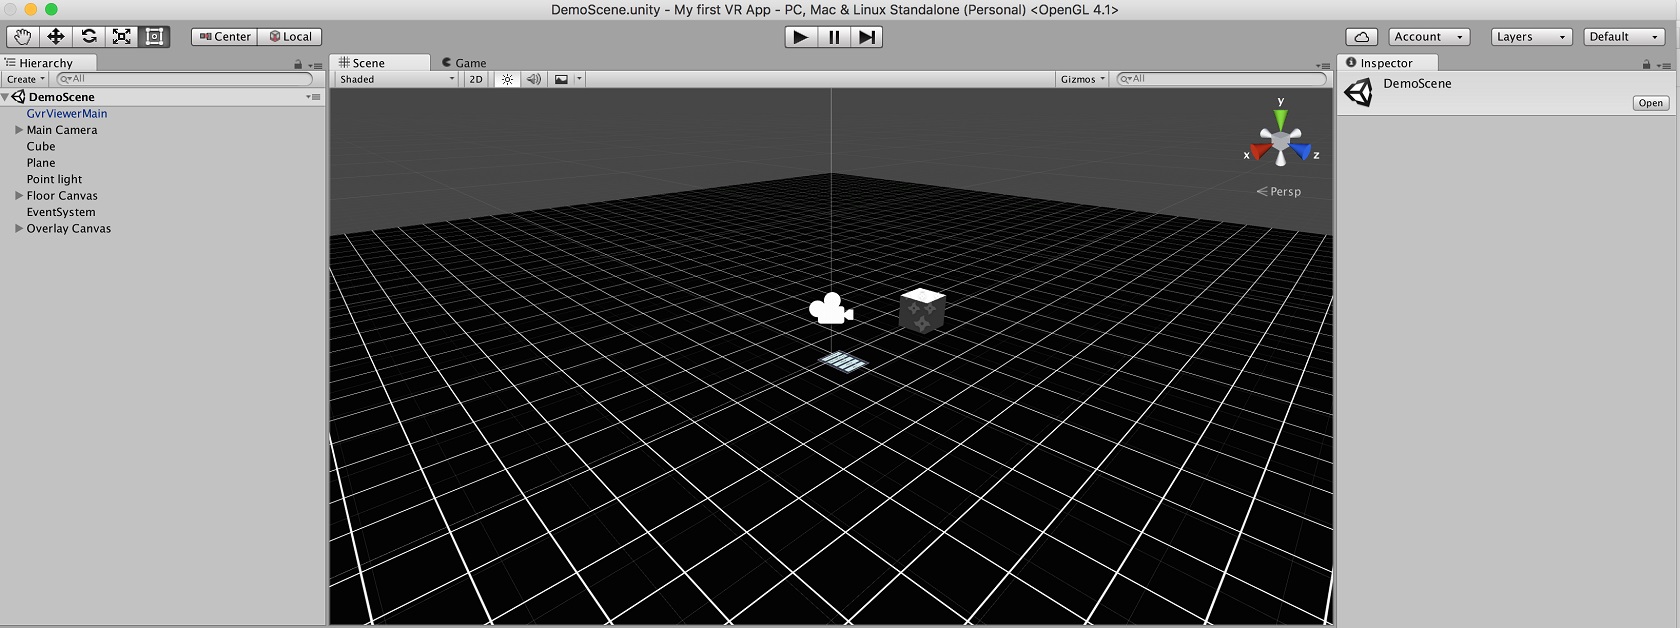
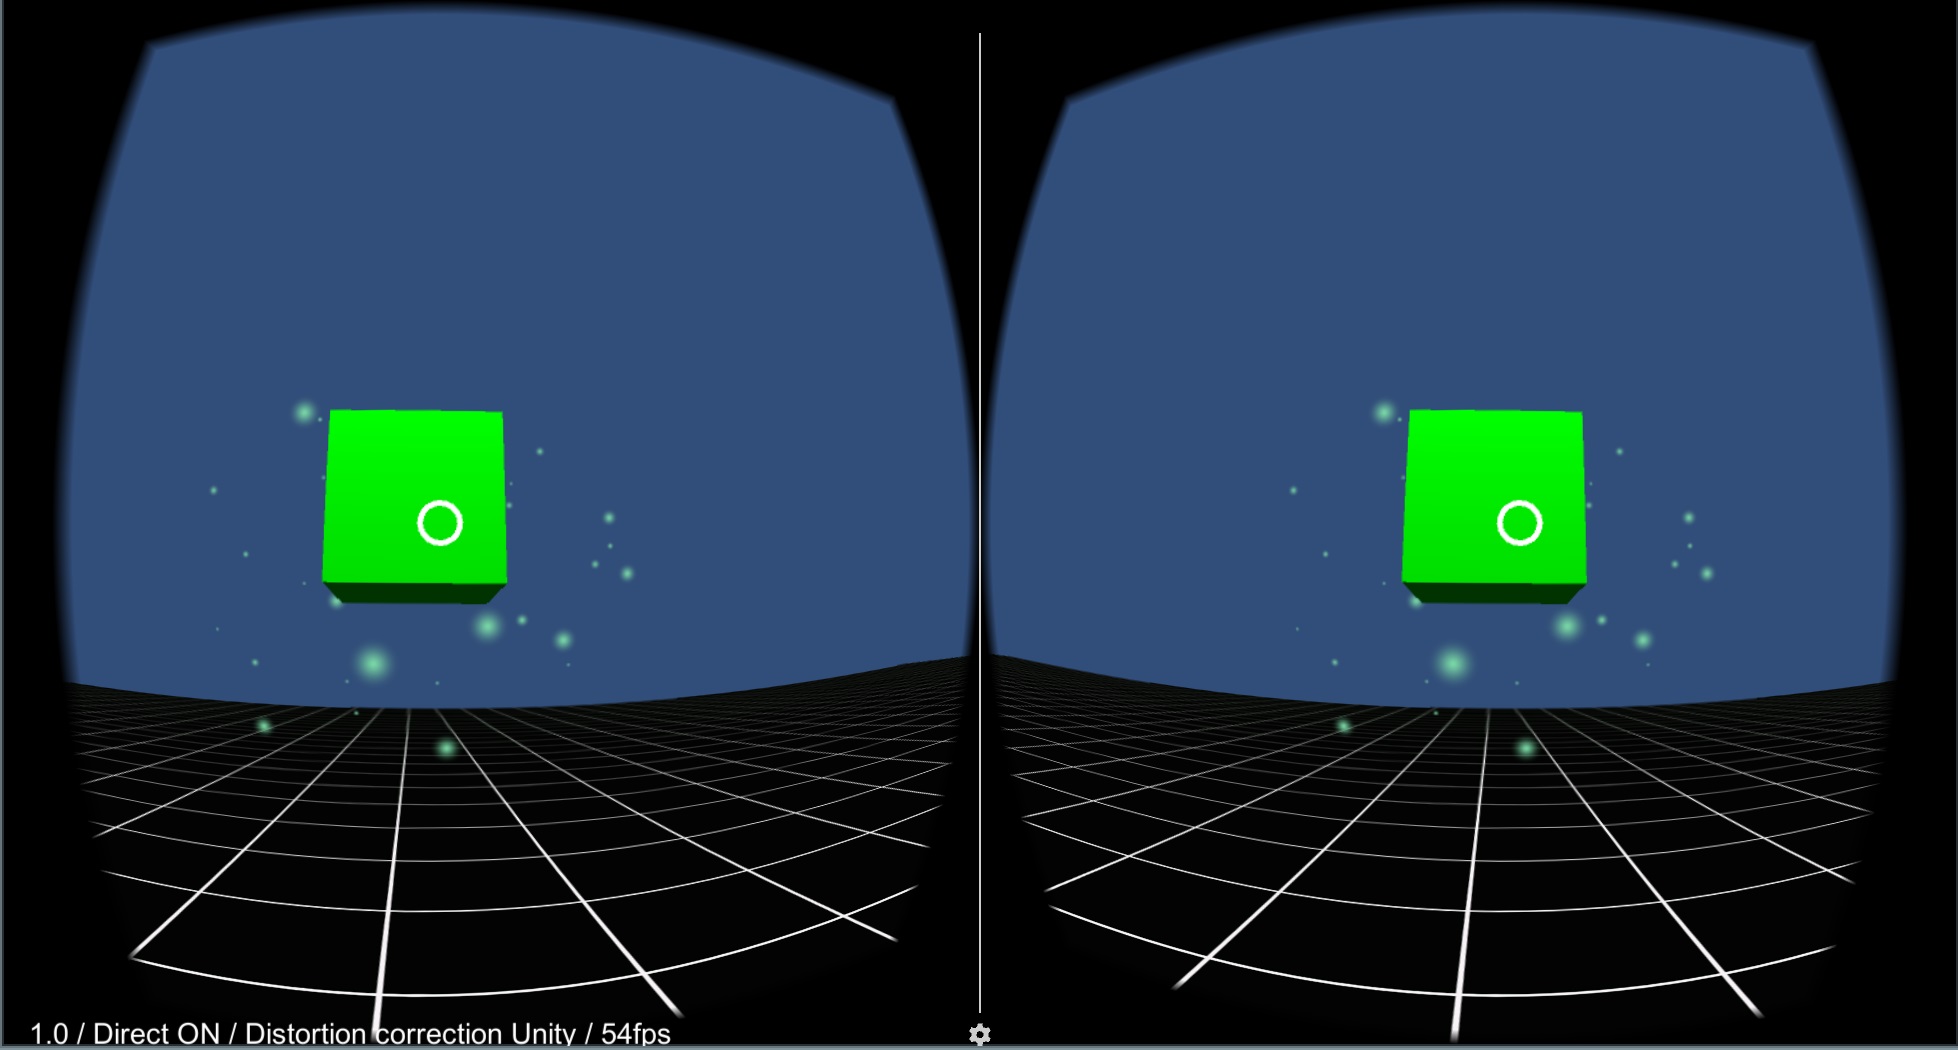
You’ll then see a new scene in the middle of your screen, consisting of a floating cube and a floor canvas. If you click the Play button at the top of the screen, you can enter game mode and enter VR. Exciting, right?
To look around in that mode, press down the Alt key and move your mouse. If you put your VR reticle on the cube and then click the left mouse button, it will teleport to another place. On the floor, you’ll see a canvas you can interact with. But let’s not worry about it, you’ve got other things to do.
We’ll now build the app, so you can view it on your phone.
Bob the Builder
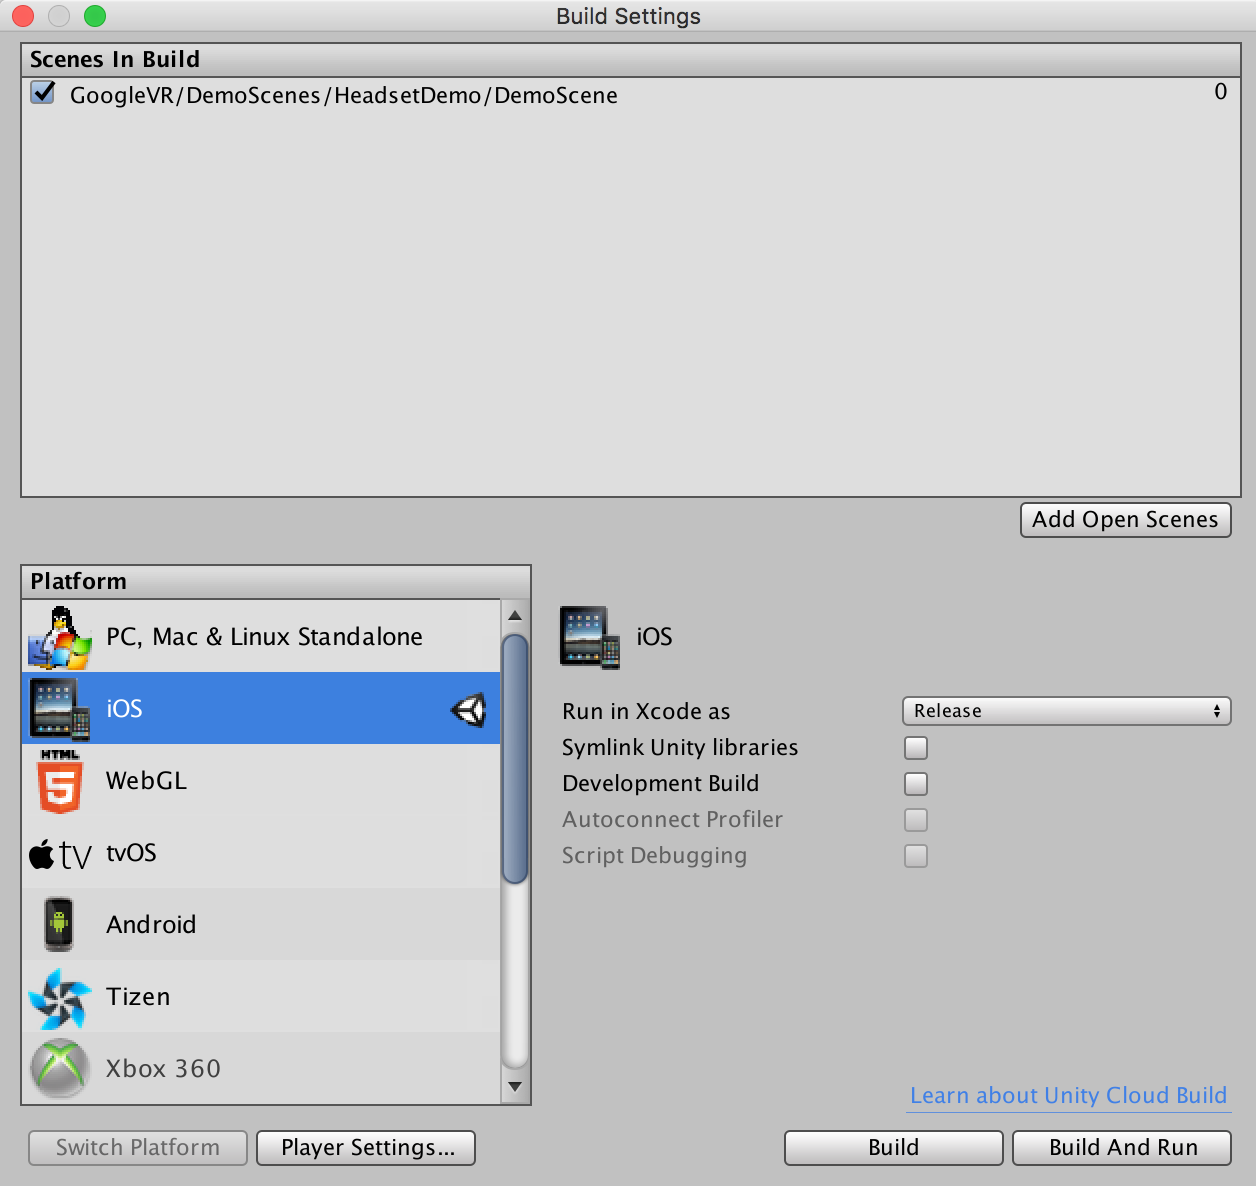
Choose File -> Build settings. Click Add Open Scenes. Then, click Build. Name your build My First VR App.
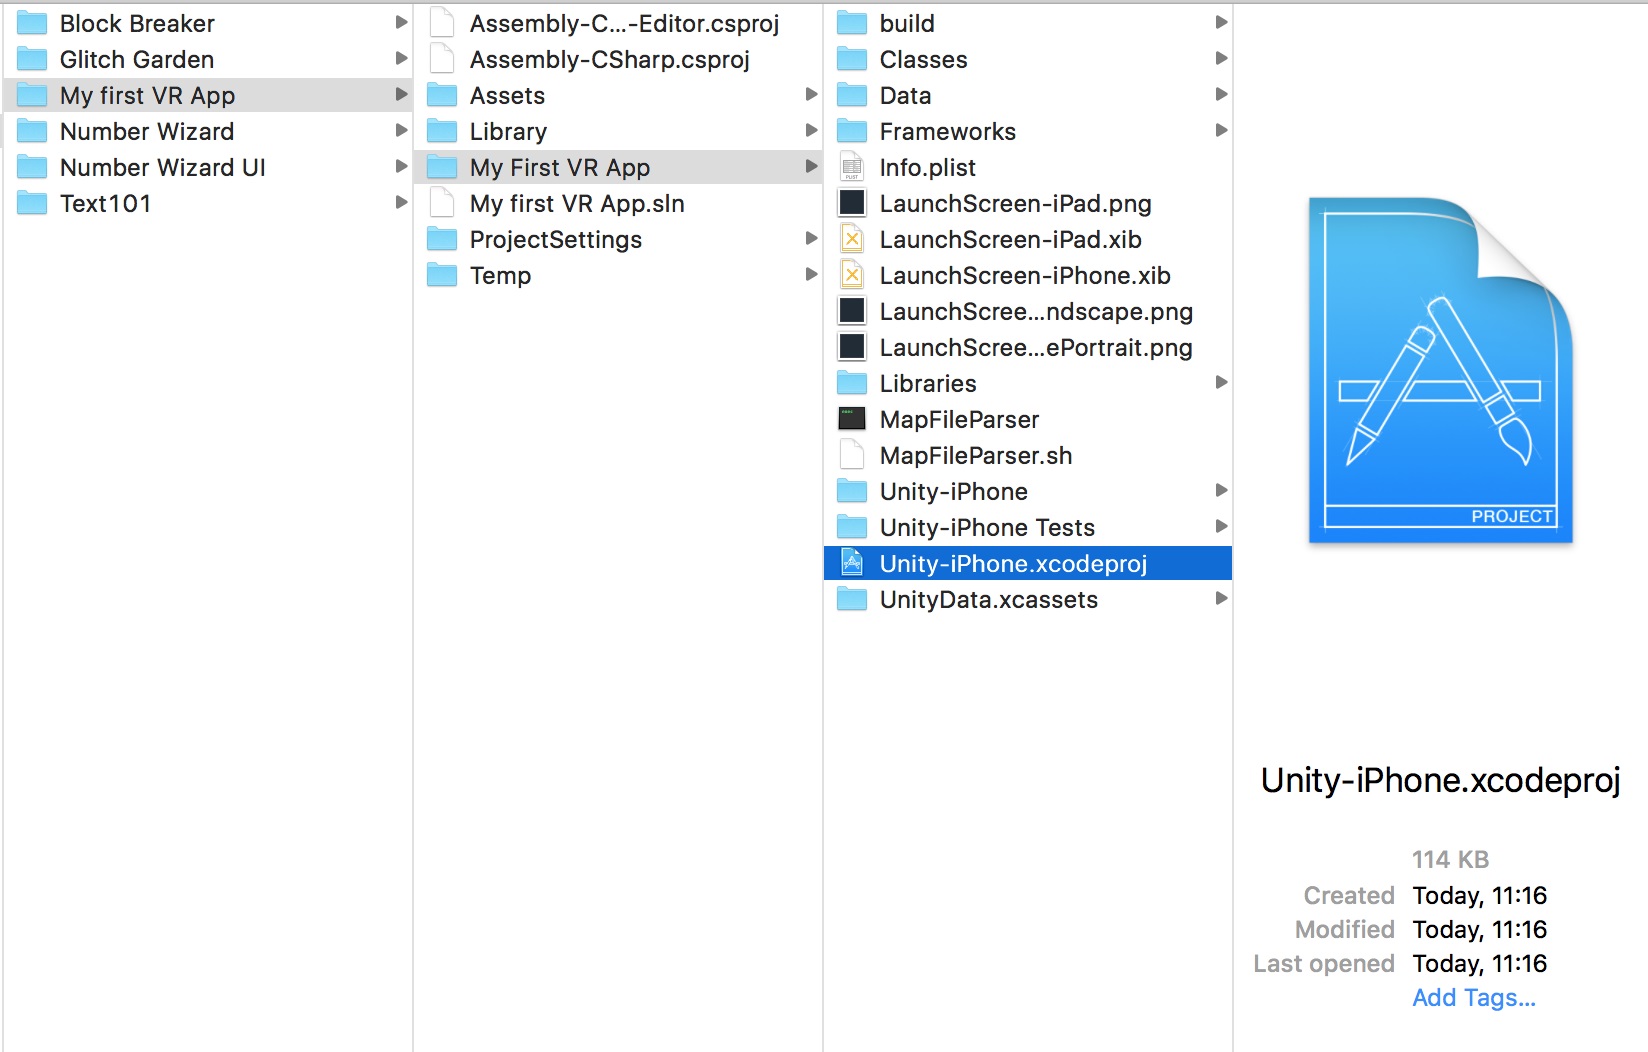
Once Unity has finished building the app, open XCode. Open your XCode project (File -> Open, select .xcodeproj).
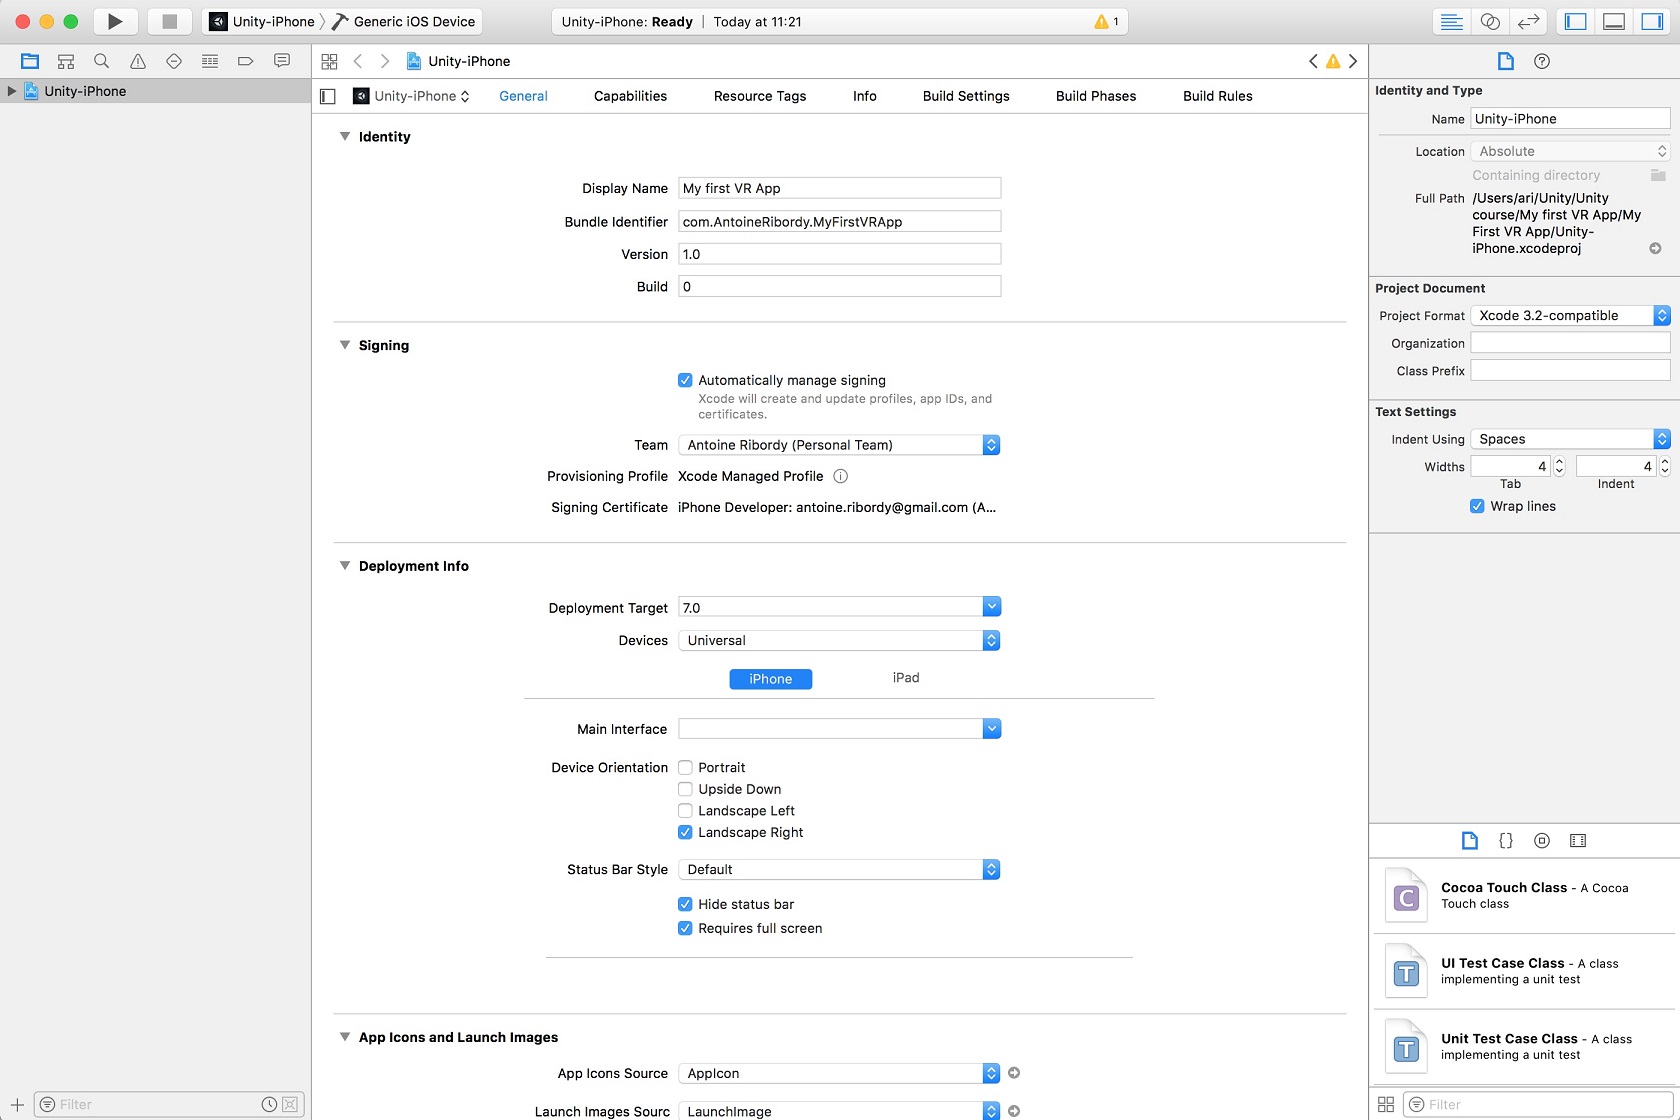
Then, click on Unity-iPhone on the left. Select your developer account under Team. It should display “Your Name (Personal Team)”.
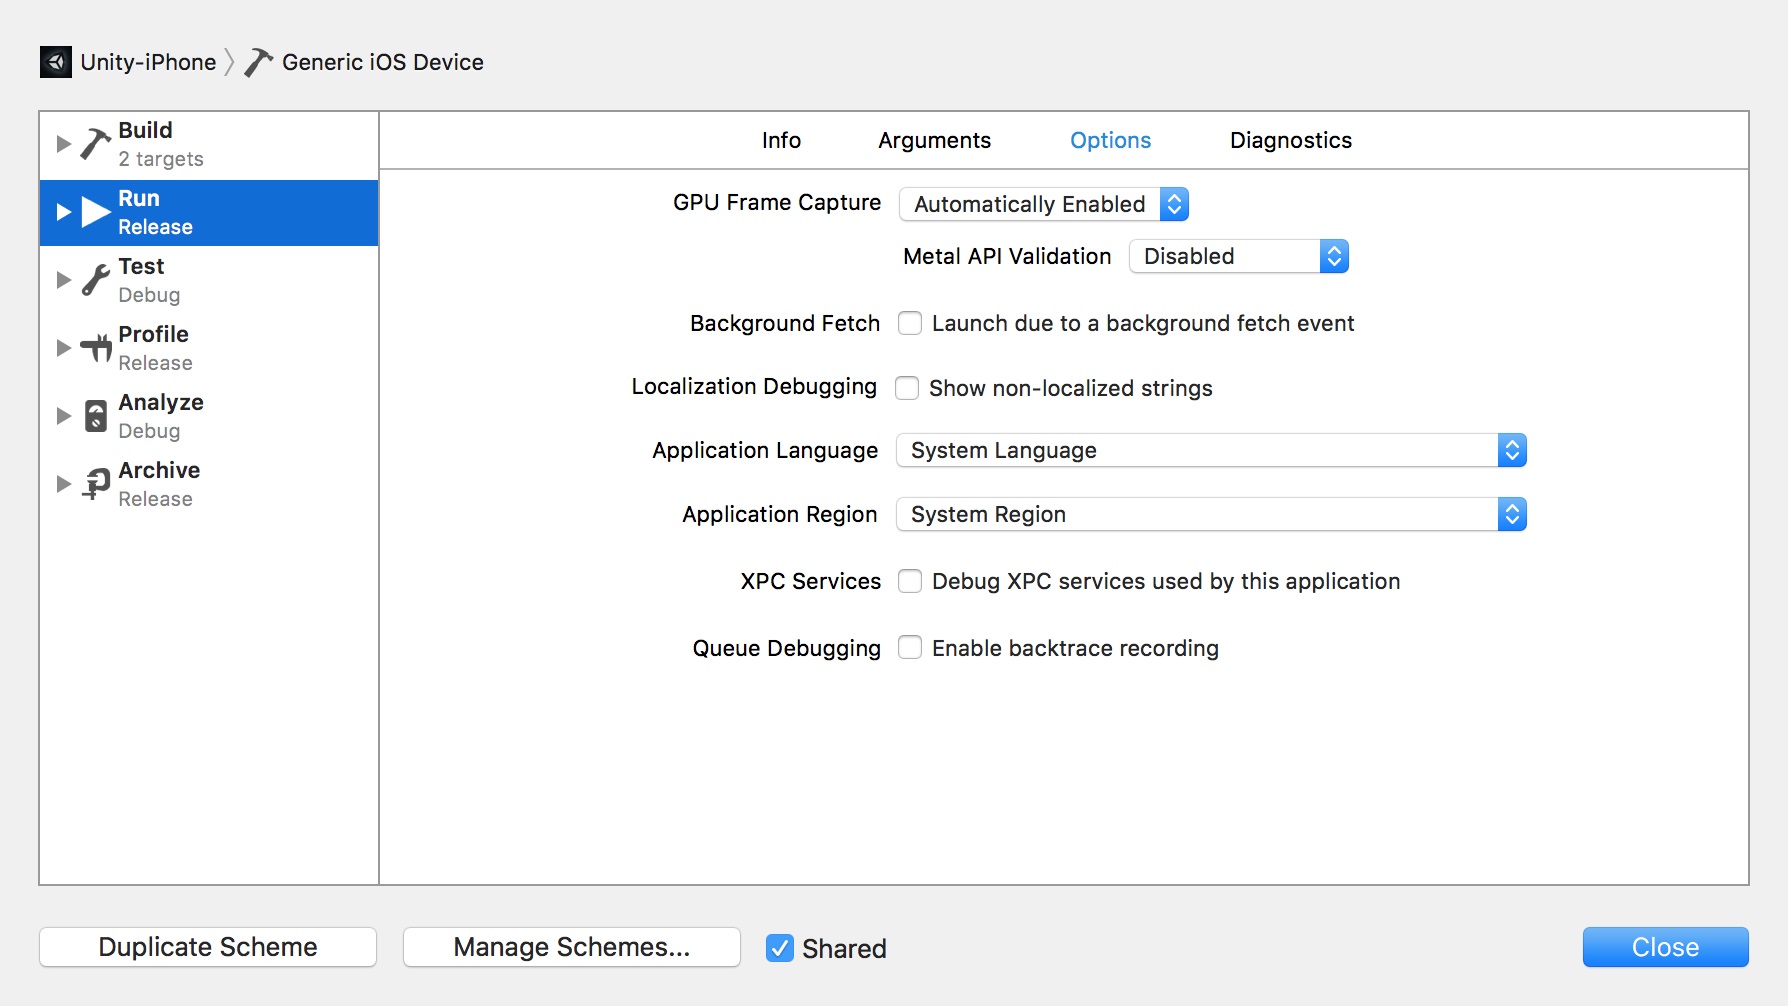
Now, this part is optional, but will help if you hit issues trying to run the iOS app (like I did). In the menus, select Product -> Scheme -> Edit Scheme. Under Metal API Validation, select “Disabled”.
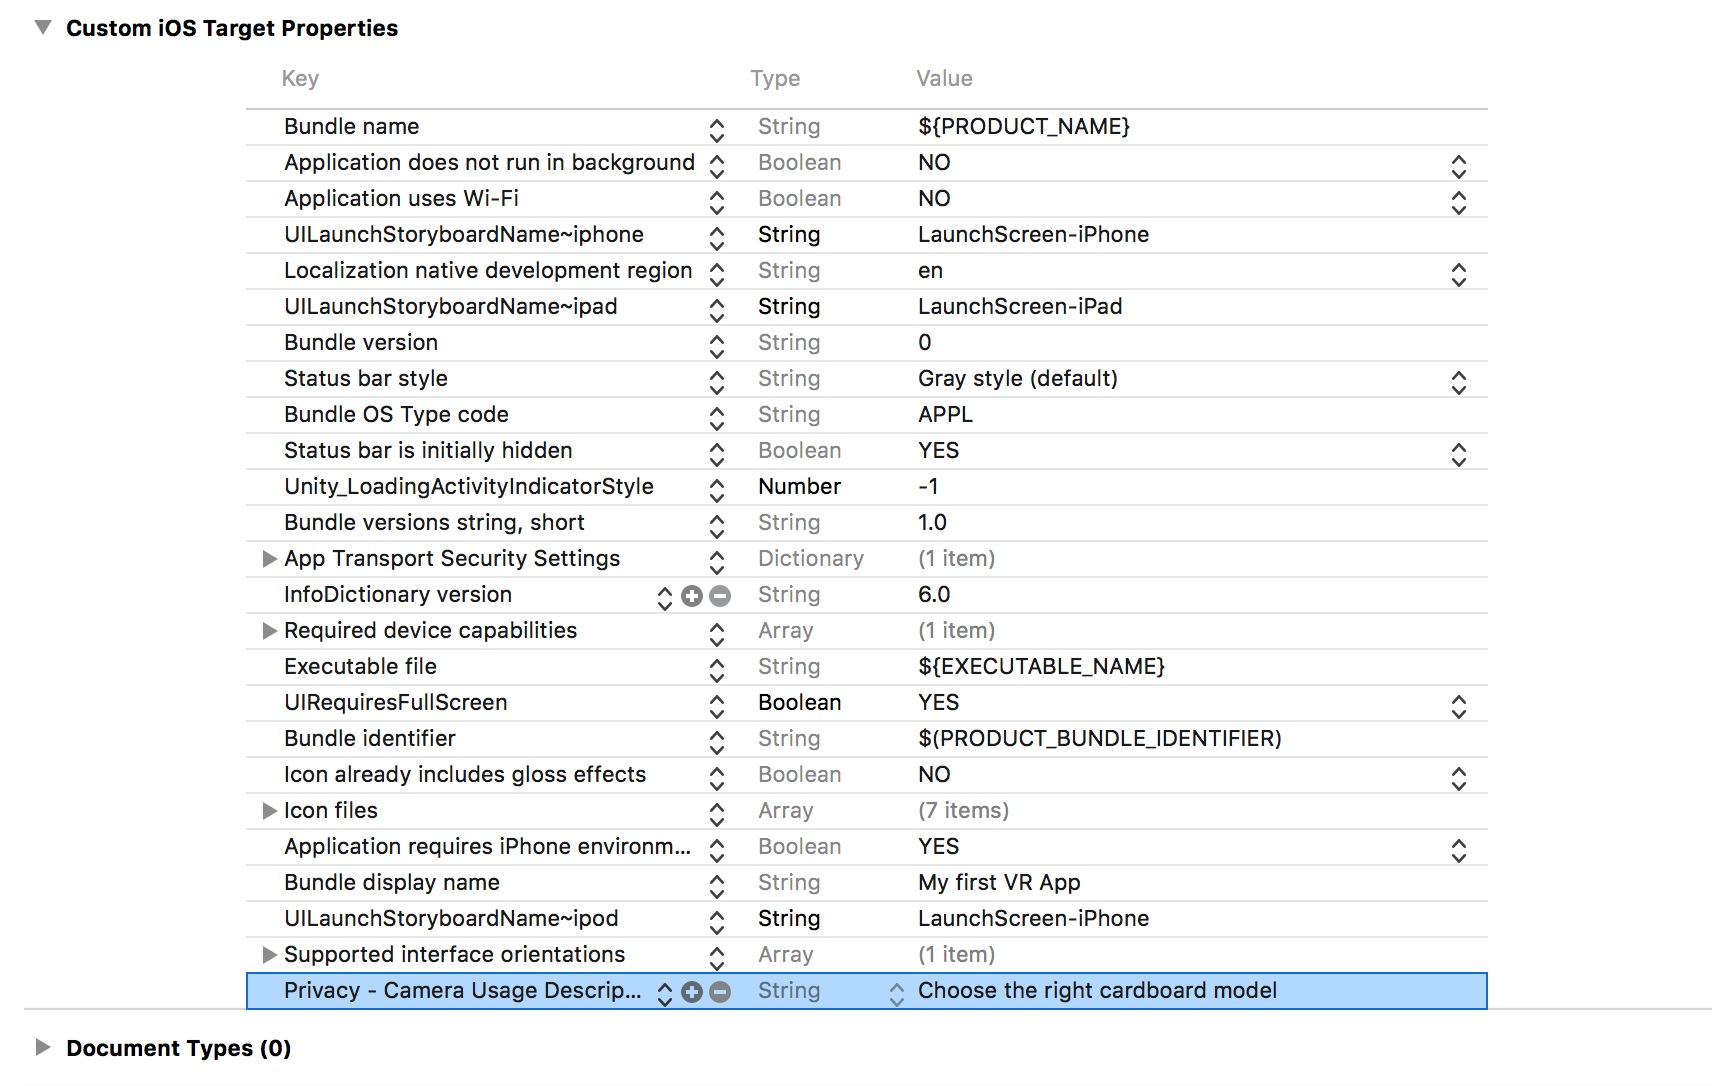
Whether you’ve disabled the Metal API Validation or not, you now need to provide the app user information on why you need to access their phone camera. It’s an iOS 10 requirement.
Why do we need to access the camera? To capture the barcode on the Google Cardboard, so the app can select the right lens separation for the cardboard.
If you don’t provide that info, the app will crash when you click on settings. You don’t know what I’m talking about? No worries, it’ll become clearer soon, when you run the app.
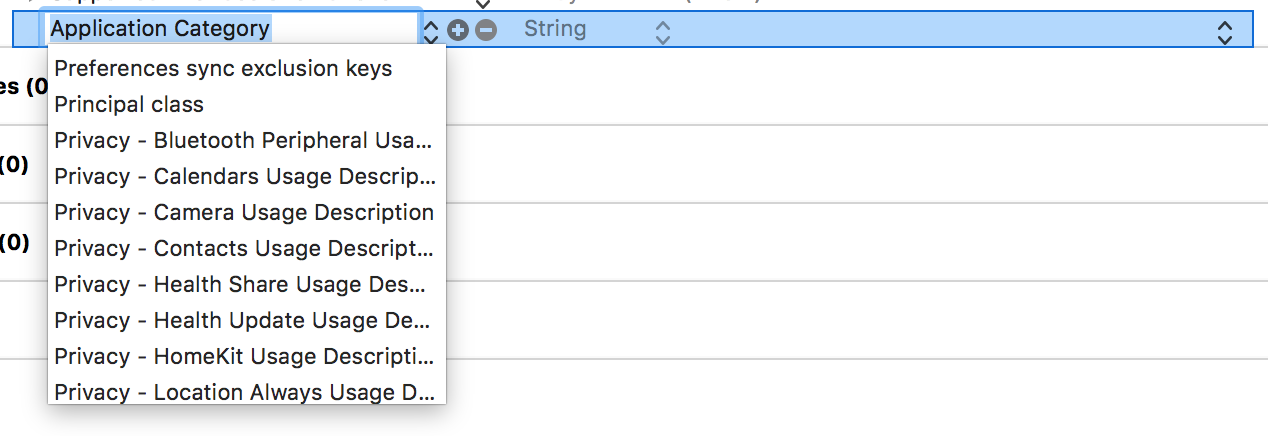
So, click on Info. In the Key column, click the + sign. Choose Privacy – Camera Usage Description. In the Value column, type something like: “Choose the right cardboard model”.
Now, connect your phone by USB and choose Product -> Run in the menus. Let XCode build the app, install it on your phone and try to run it.
Starting the app will fail the first time round. You’ll then need to go into your phone settings. Click General -> Device Management. There, approve yourself as a developer. Then you can do Product -> Run in XCode again and the app will start.
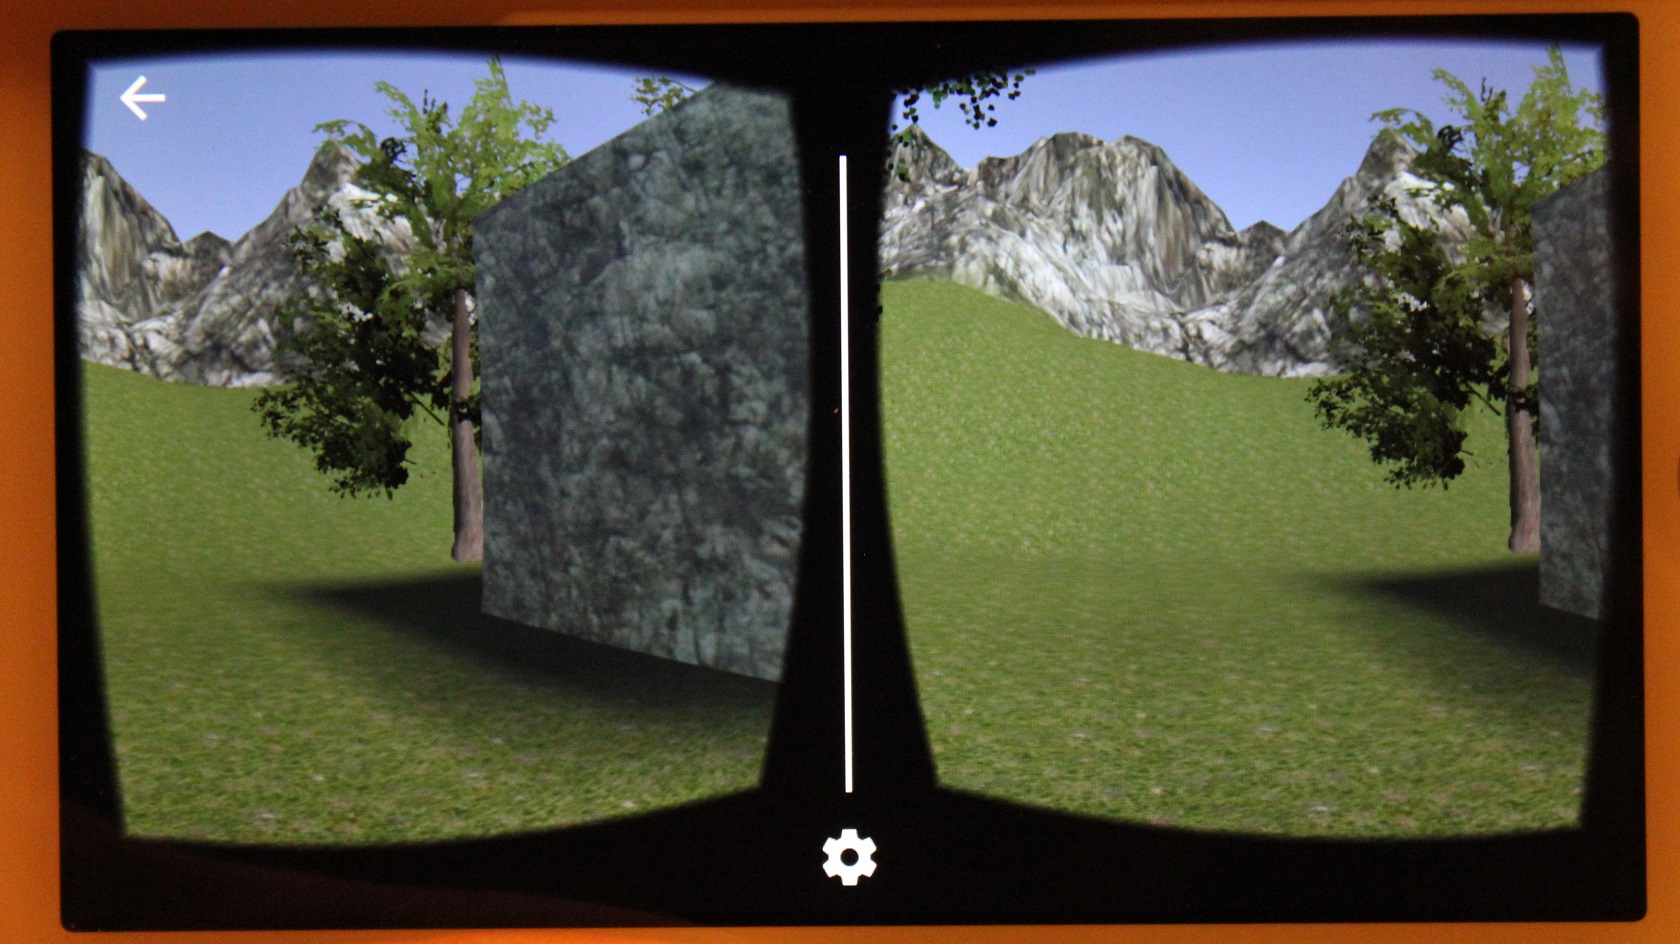
If all went well, you can now put your phone in the Google Cardboard. You can then look around and click on the cube with your cardboard trigger button.
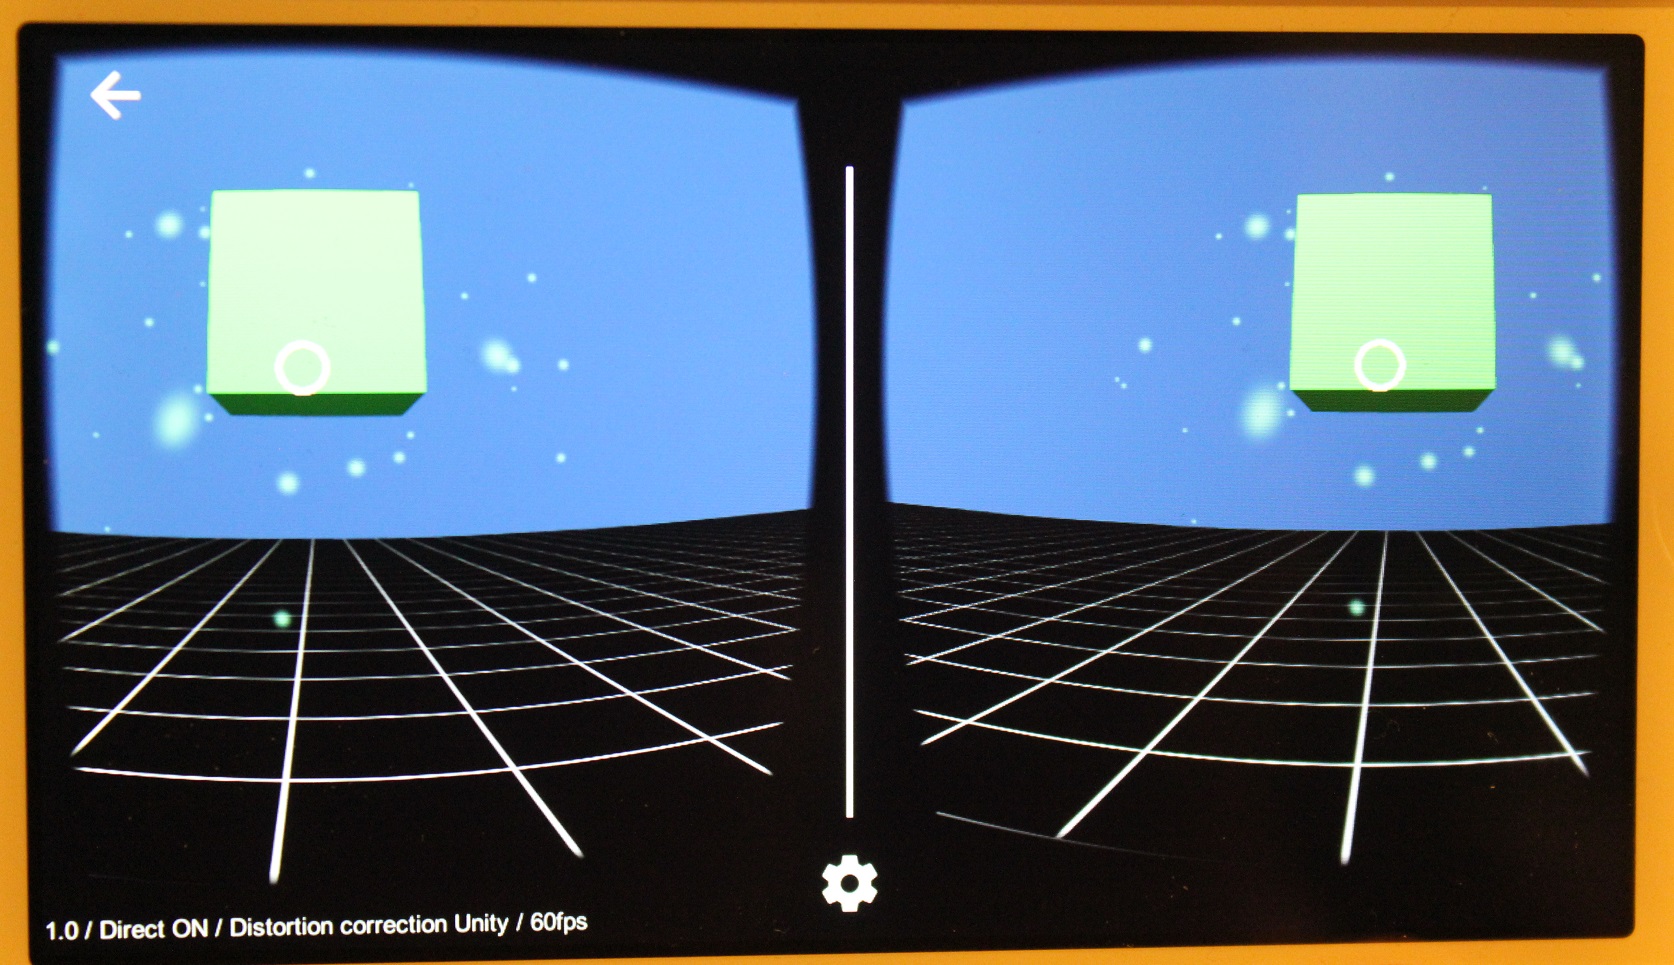
If you need to change the settings, you can click on the little cogwheel at the bottom (or top) of the screen. The app will then access your camera to recognize the type of Cardboard you’re using. Remember I was talking about accessing the phone earlier? This is it.
Ok, you’ve now got your first running app, congratulations! But, wait…
You didn’t really create that app, did you? We’ve been using a demo scene that Google created.
So, you’re not done yet. Now’s your chance to be creative and build your own unique VR experience.
Your Own Little Big Planet
Go back to Unity. Your project should still be opened. If not, open it again. Then, in the menus, choose File -> New Scene.

Once opened, save your scene: File -> Save Scene. Call it Main.
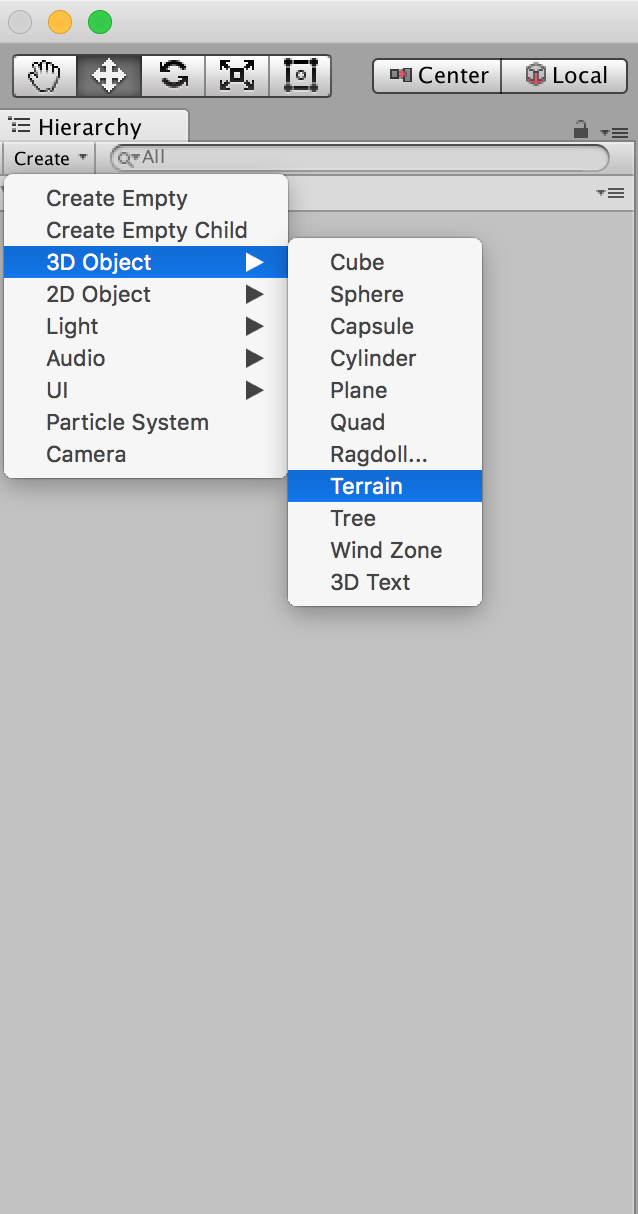
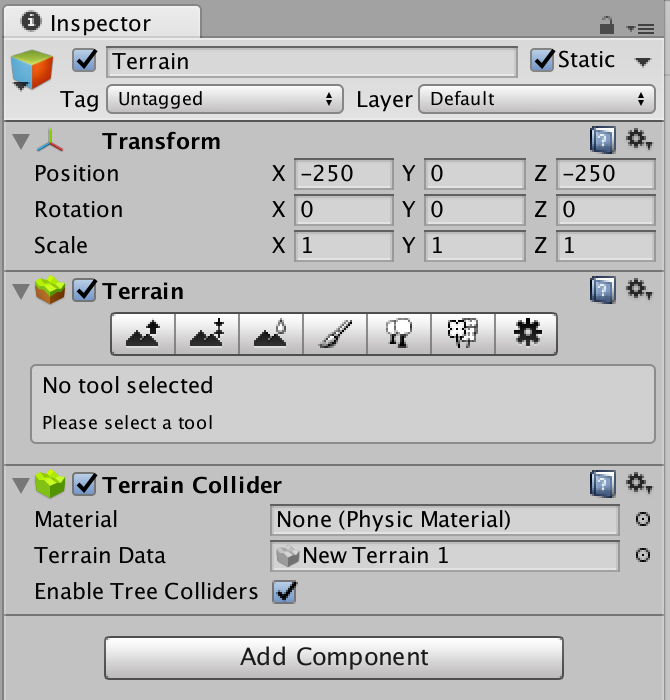
Now in the top left of your screen, click Create -> 3D object -> Terrain. Then, change its position to -250, 0, -250 in the Inspector on the right hand side.
To look around your scene, first hover the cursor over the scene view in middle of the screen. Then, click the right mouse button and move your mouse. The middle mouse button allows you to pan the view.
Holding Alt + left mouse button while moving your mouse will rotate the view around the object currently selected. Finally, you can zoom in and out with your scroll wheel.
We’re now going to add a VR Viewer for Cardboard. In the bottom left of your screen, go into your Asset folder -> GoogleVR -> Prefabs. You’ll see GvrViewerMain.prefab. Click and drag it into your hierarchy on the top left.
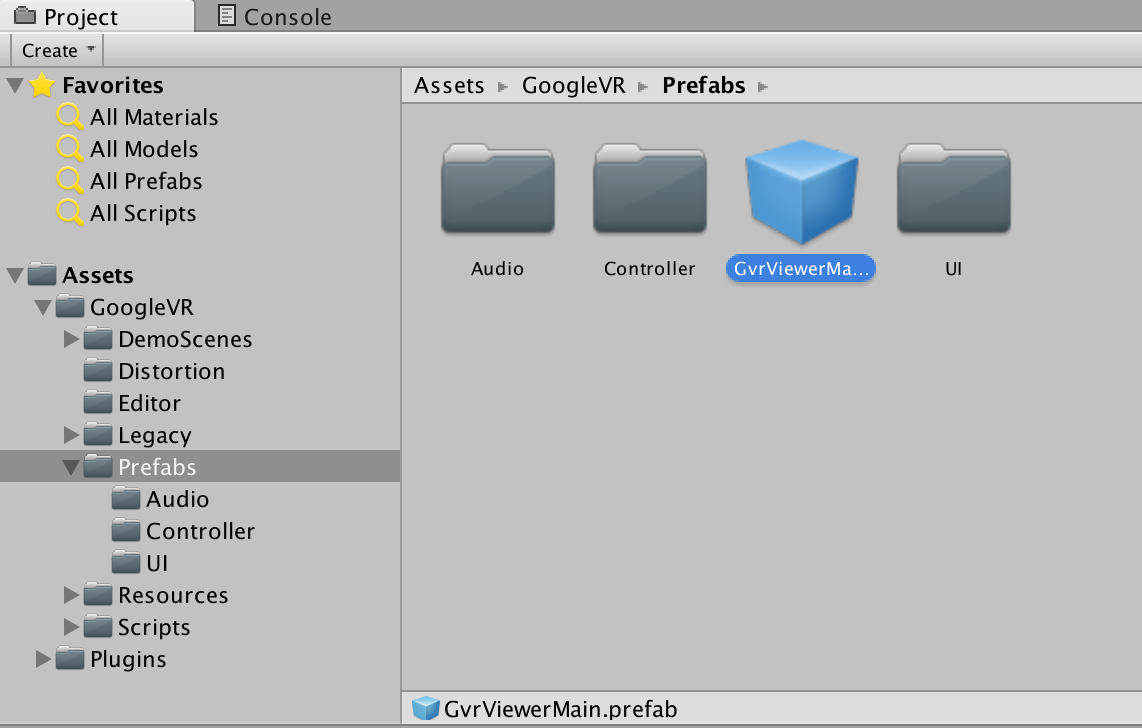
Now if you click play, you’ll get a binocular view of the world. There’s nothing exciting to look at yet, but you’re in VR!
Let’s add a house to make your scene more interesting. More exactly, it’ll be a cube, but let’s pretend it’s a house, ok?
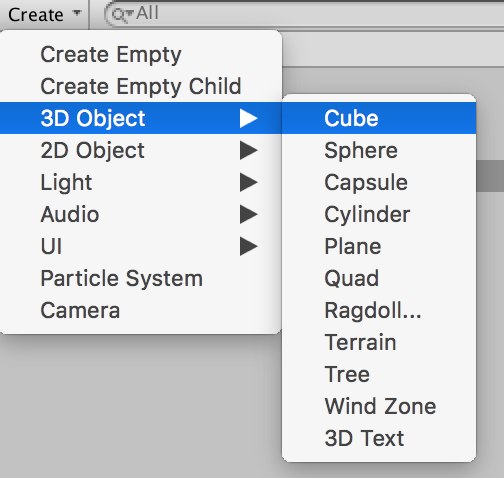
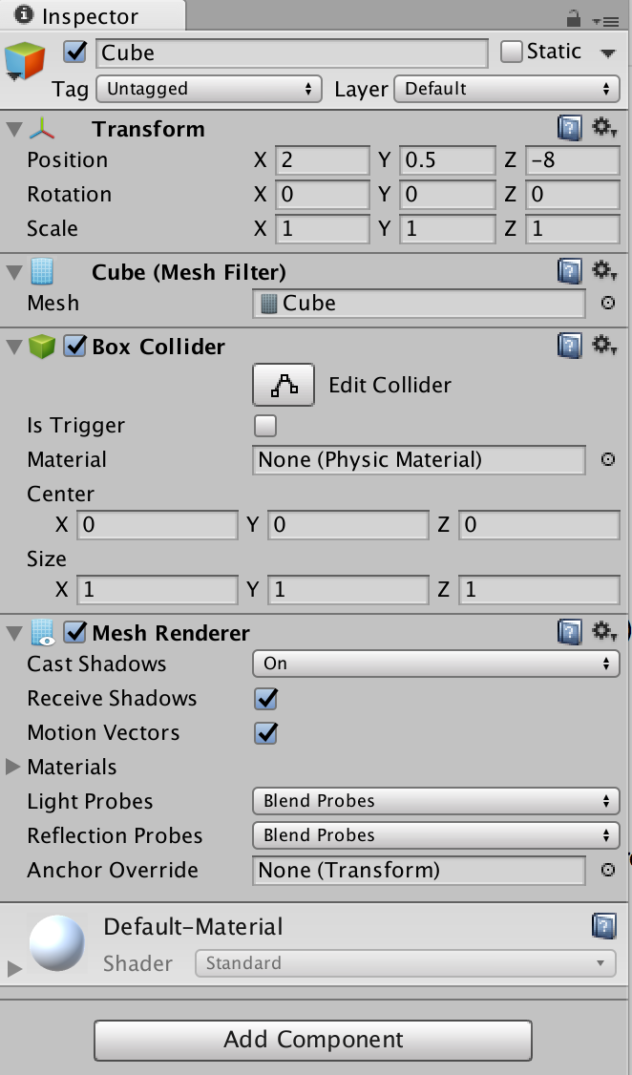
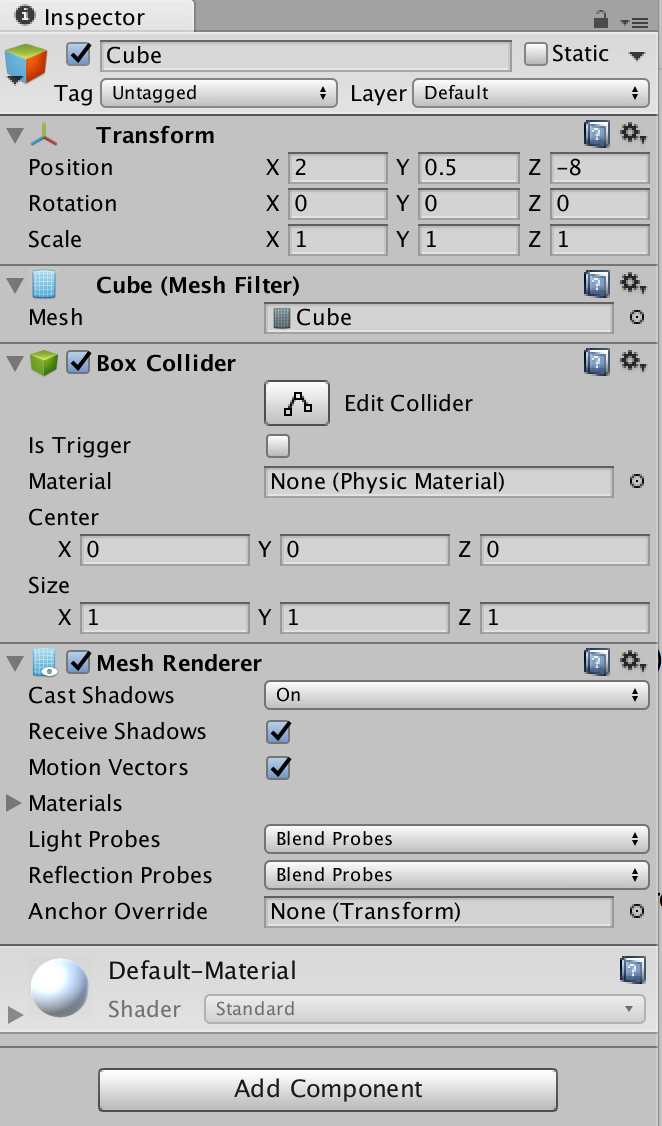
Click Create -> 3D Object -> Cube. Click 3 times on the cube (or right click -> Rename) and change its name to House. Change it’s position to 2, 0.5, -8. Now if you click the play button again, you’ll see your house cube.
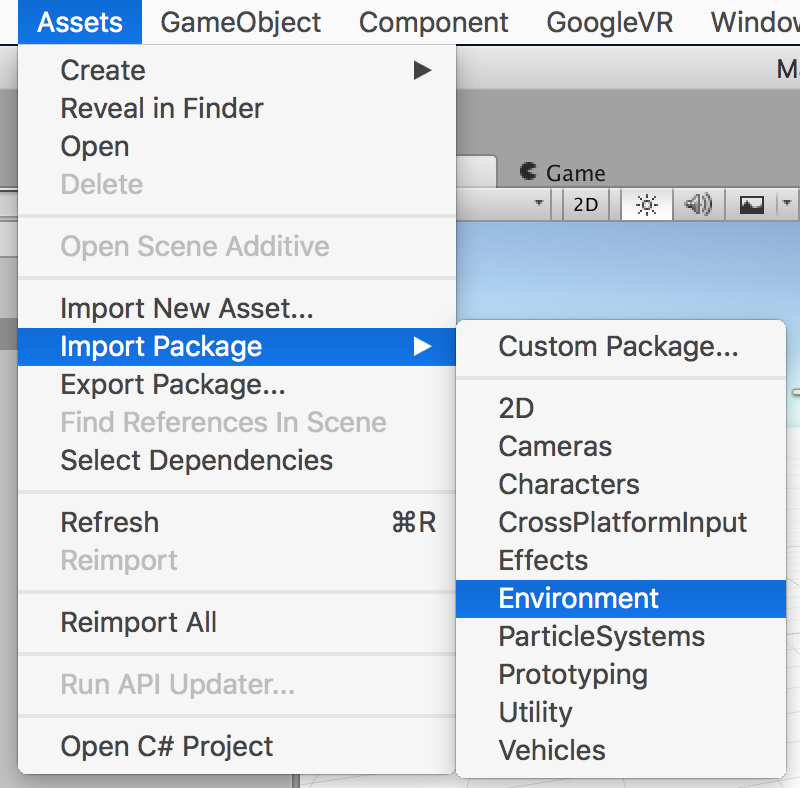
Let’s add some textures to make our scene more lively. Choose Assets -> Import Package -> Environment. The Import Unity Package window will automatically select everything. Click Import.
Once imported, you’ll see your newly imported package in the Project Explorer in the bottom left. It’s in the Standard Assets folder.
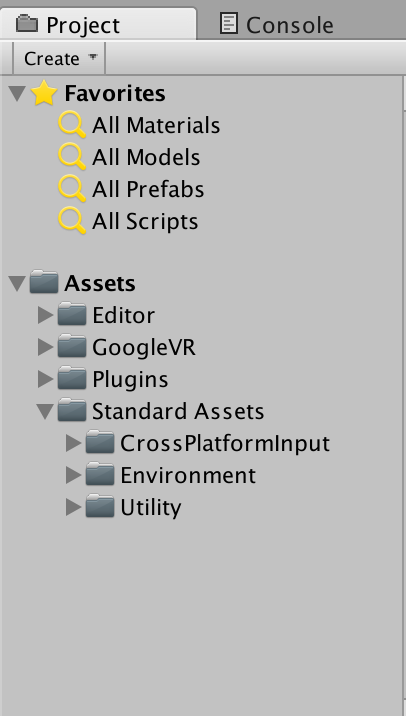
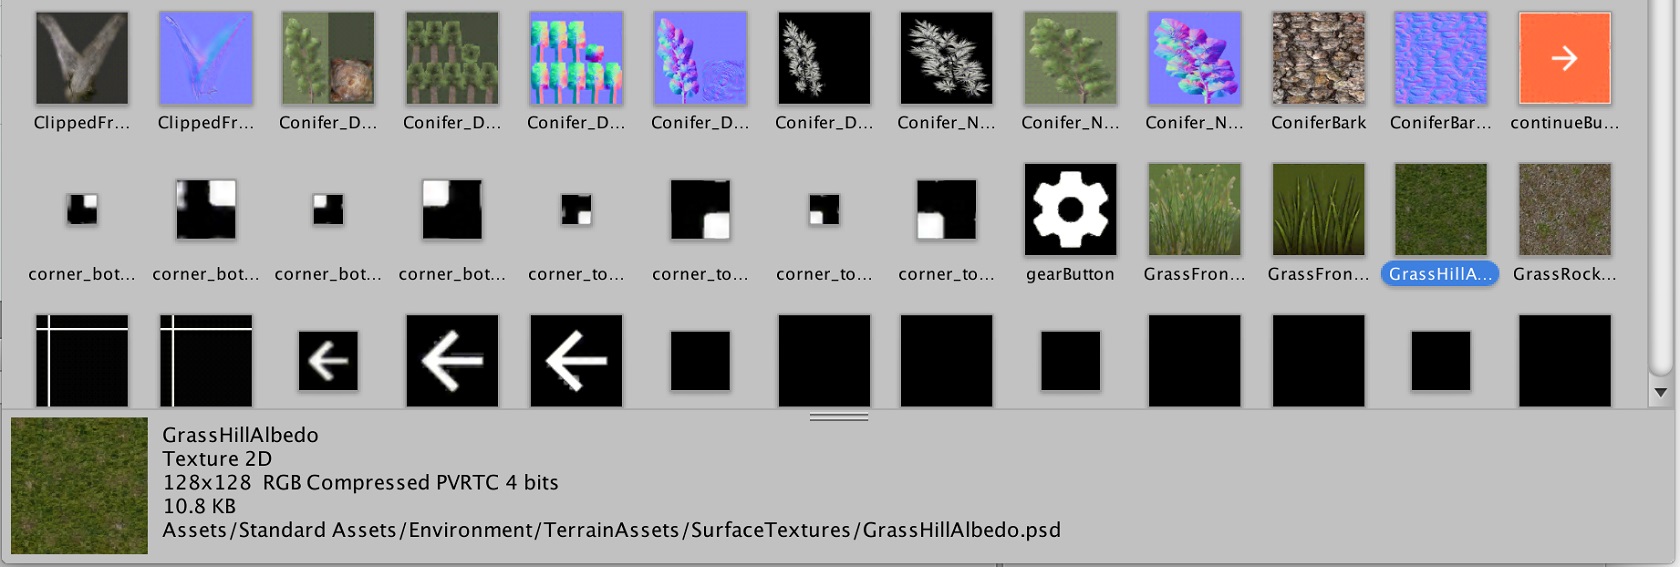
Now, select your Terrain in the Hierarchy window. Click on the brush symbol. Click Edit Textures -> Add Texture. In the Add Terrain Texture window, click on the Select button under the left grey window (marked “None (Texture 2D)”). Scroll down and select GrassHillAlbedo.
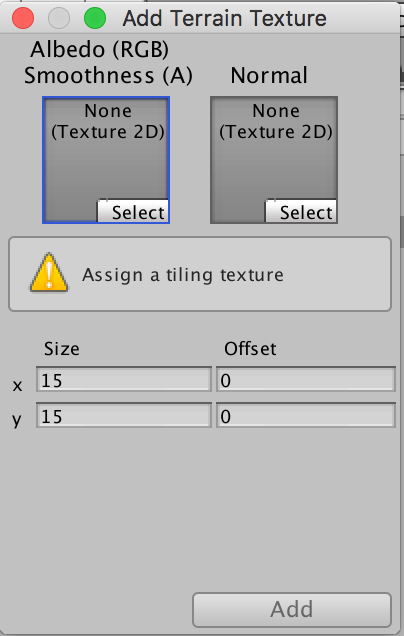
Then, in the Add Terrain Texture window, select 1 and 1 for the “Size x” and “Size y” fields. Finally, click Add.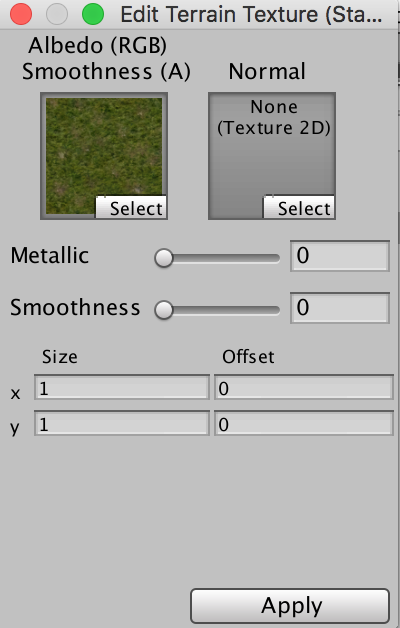
Hit the play button. The ground is starting to look more interesting!

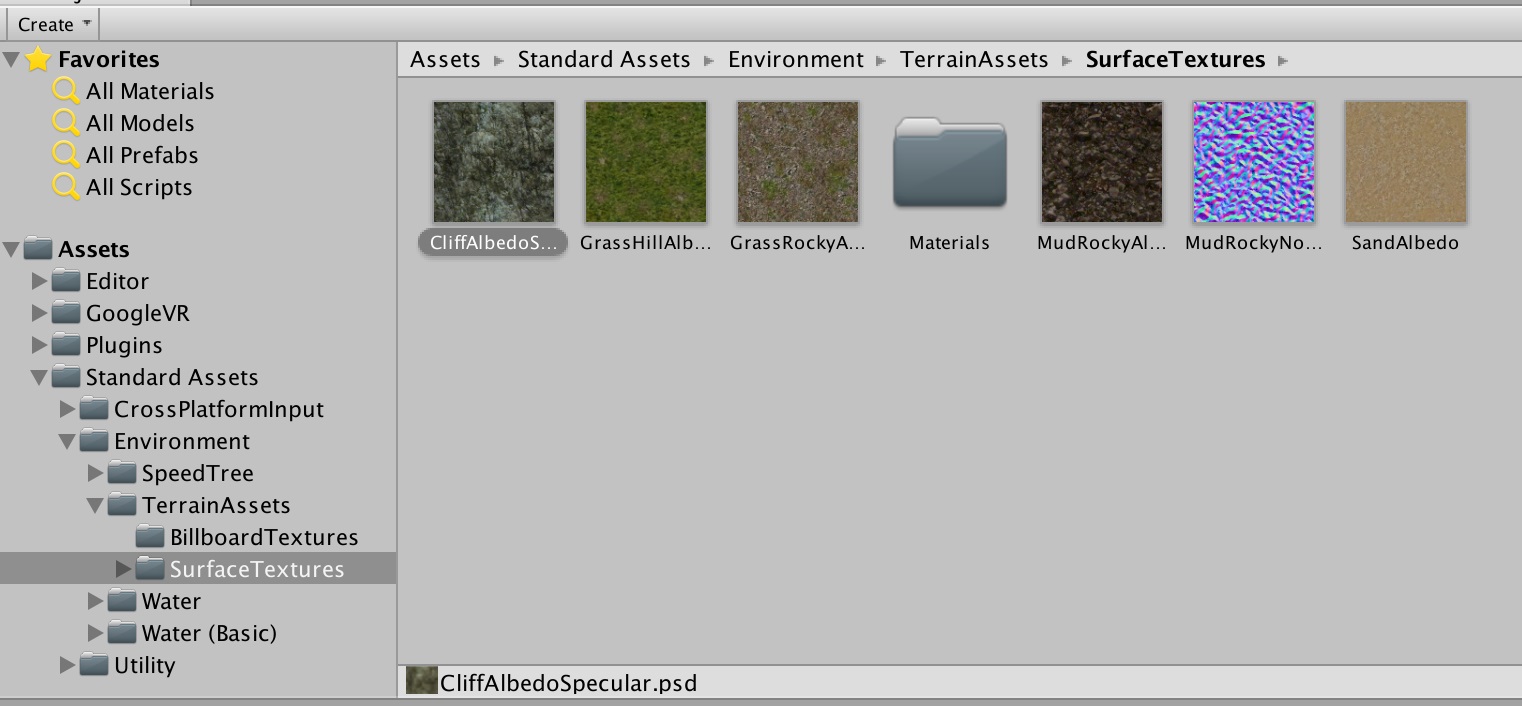
Let’s also add texture to our cube. Go into your Standard Assets folder -> Environment -> TerrainAssets -> SurfaceTextures. Select CliffAlbedoSpecular.psd and drag and drop it on the cube in your scene.
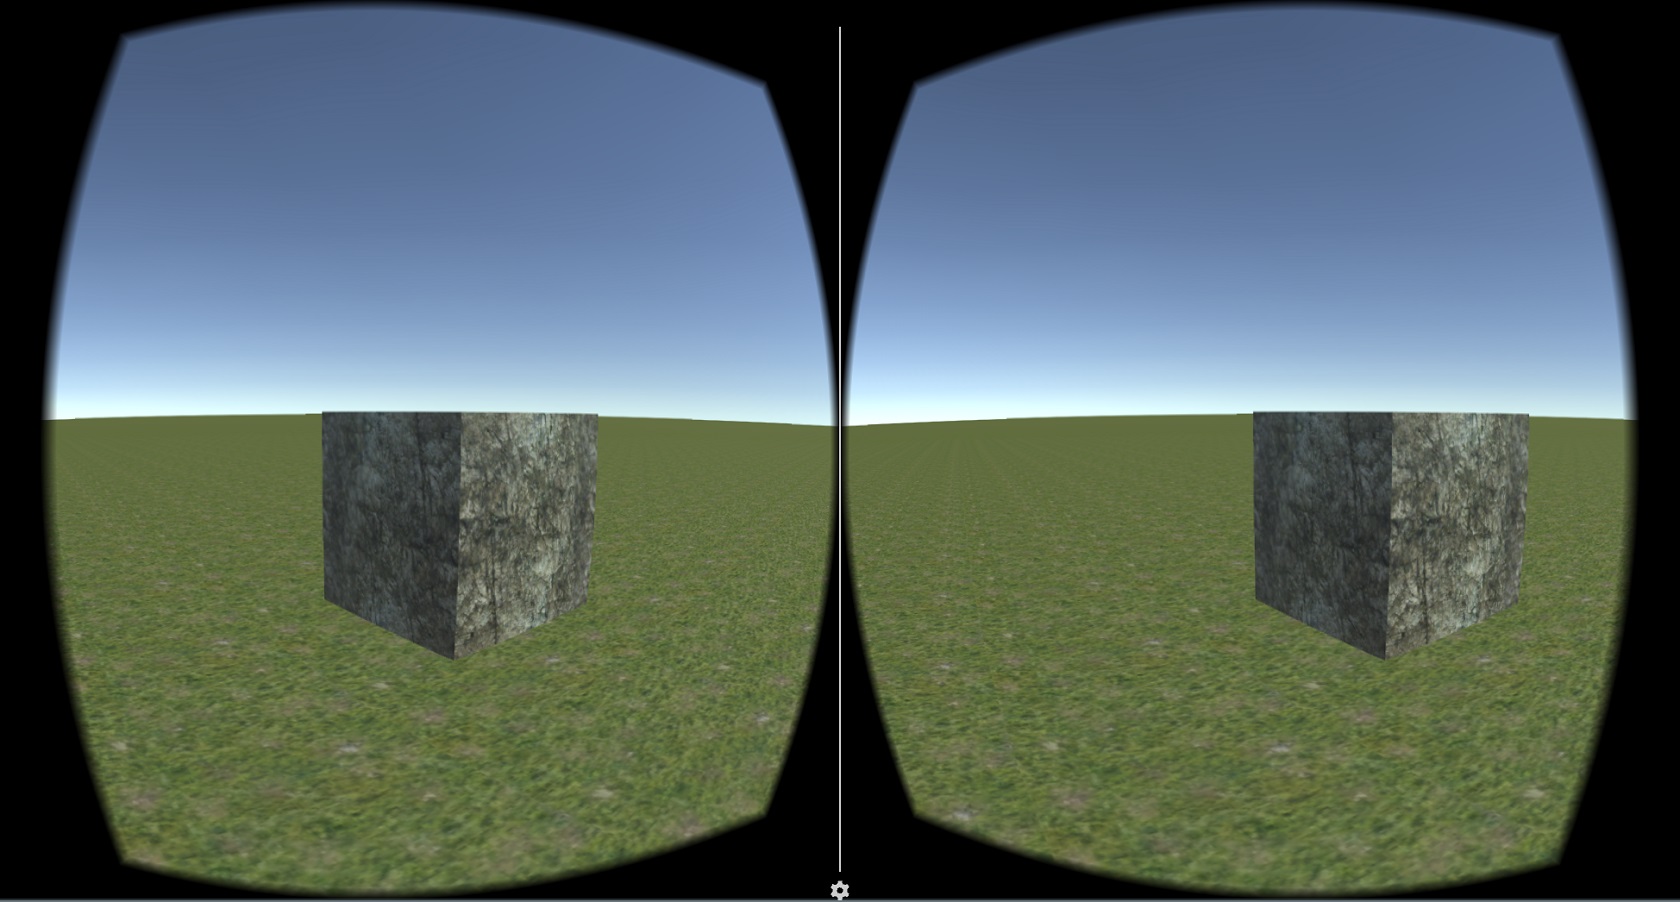
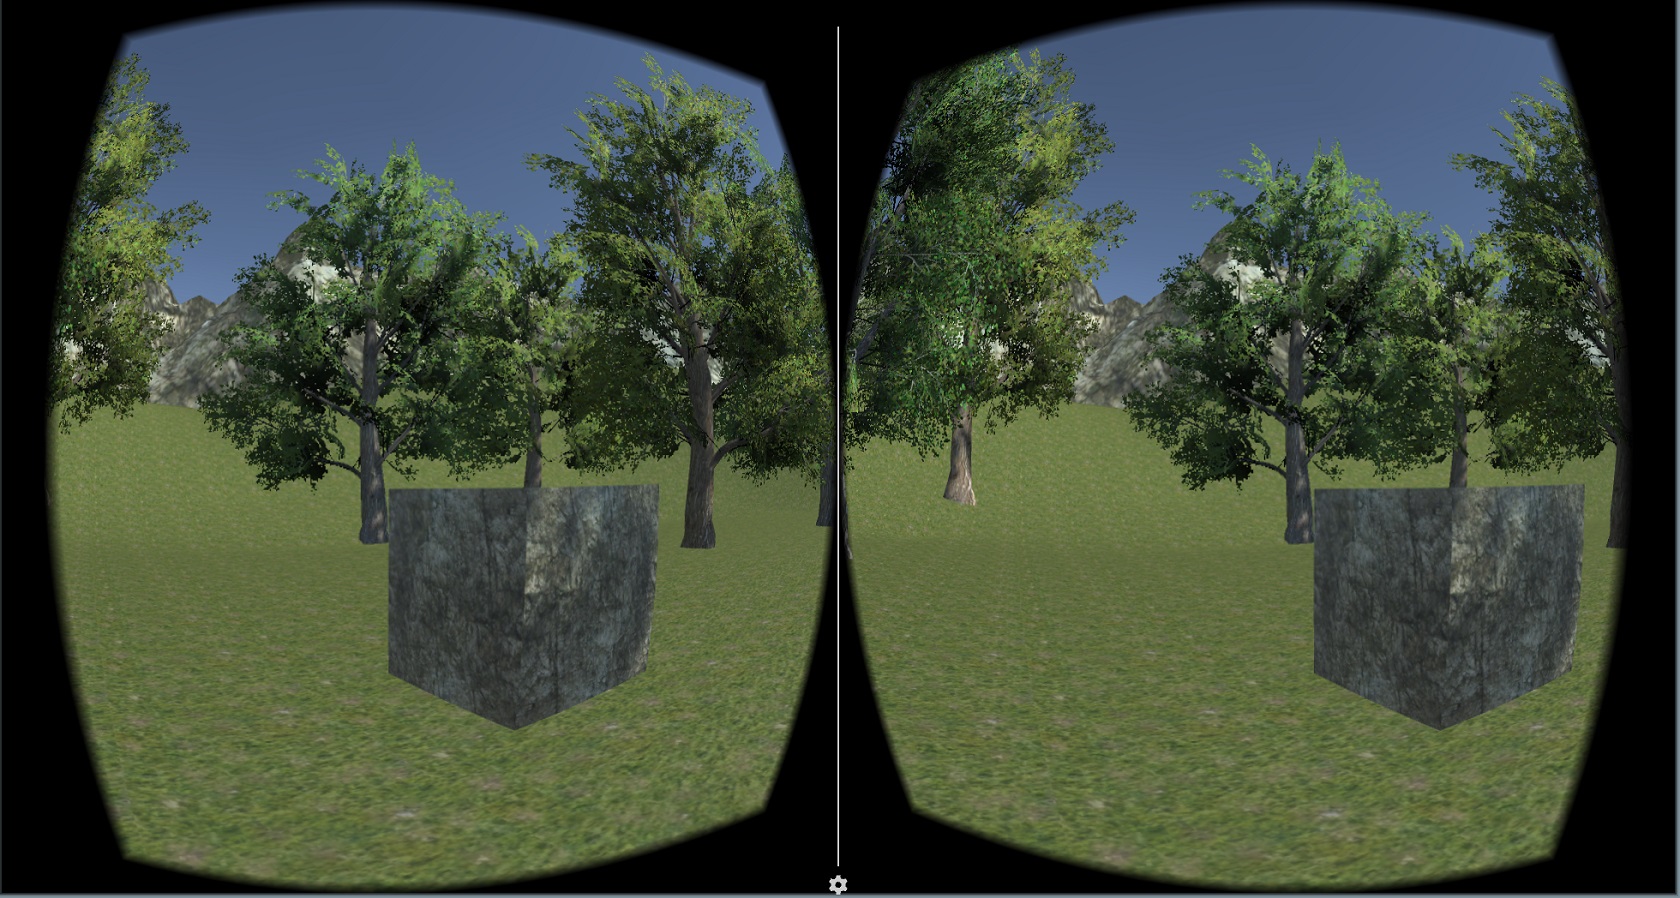
If you click play, this is what you should see:
Populous
We’ll now add a couple of trees. Not too many, to keep a good performance. Remember, you need a high frame rate for VR, to avoid motion sickness. This is a challenge for mobile applications.

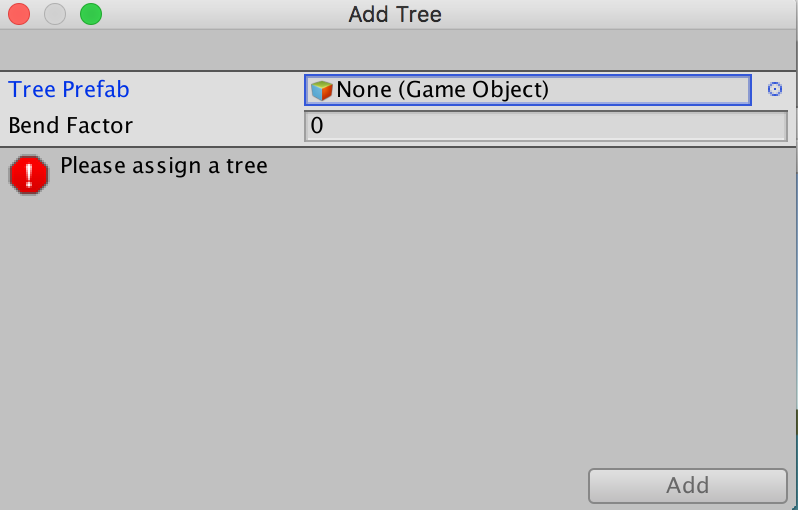
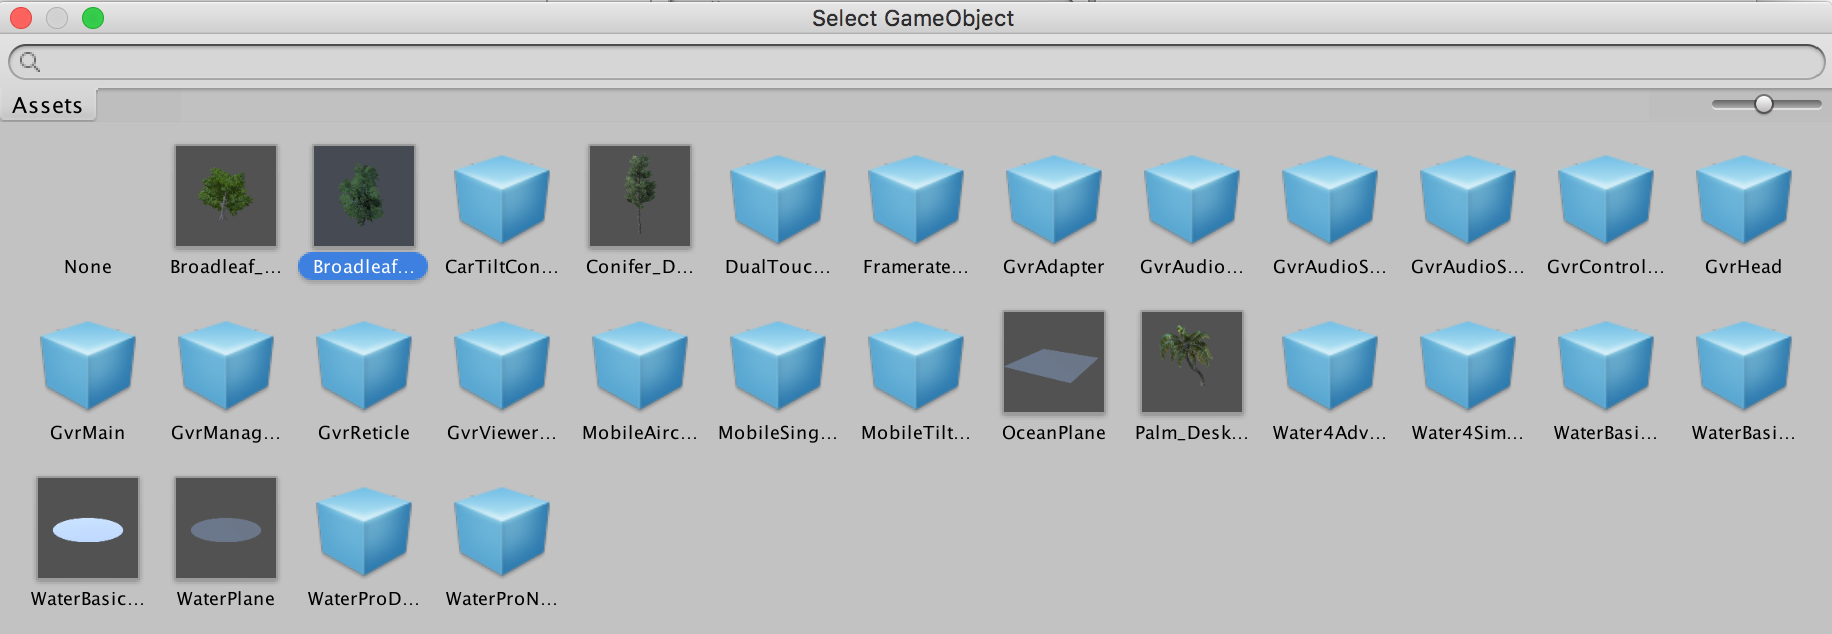
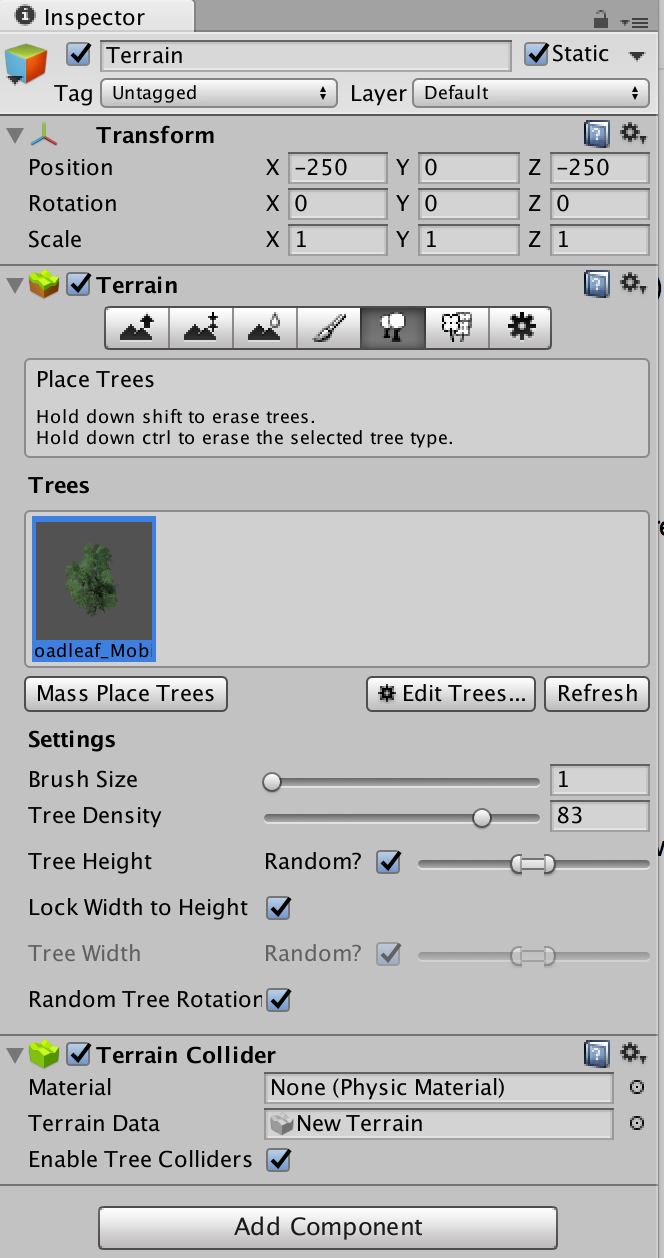
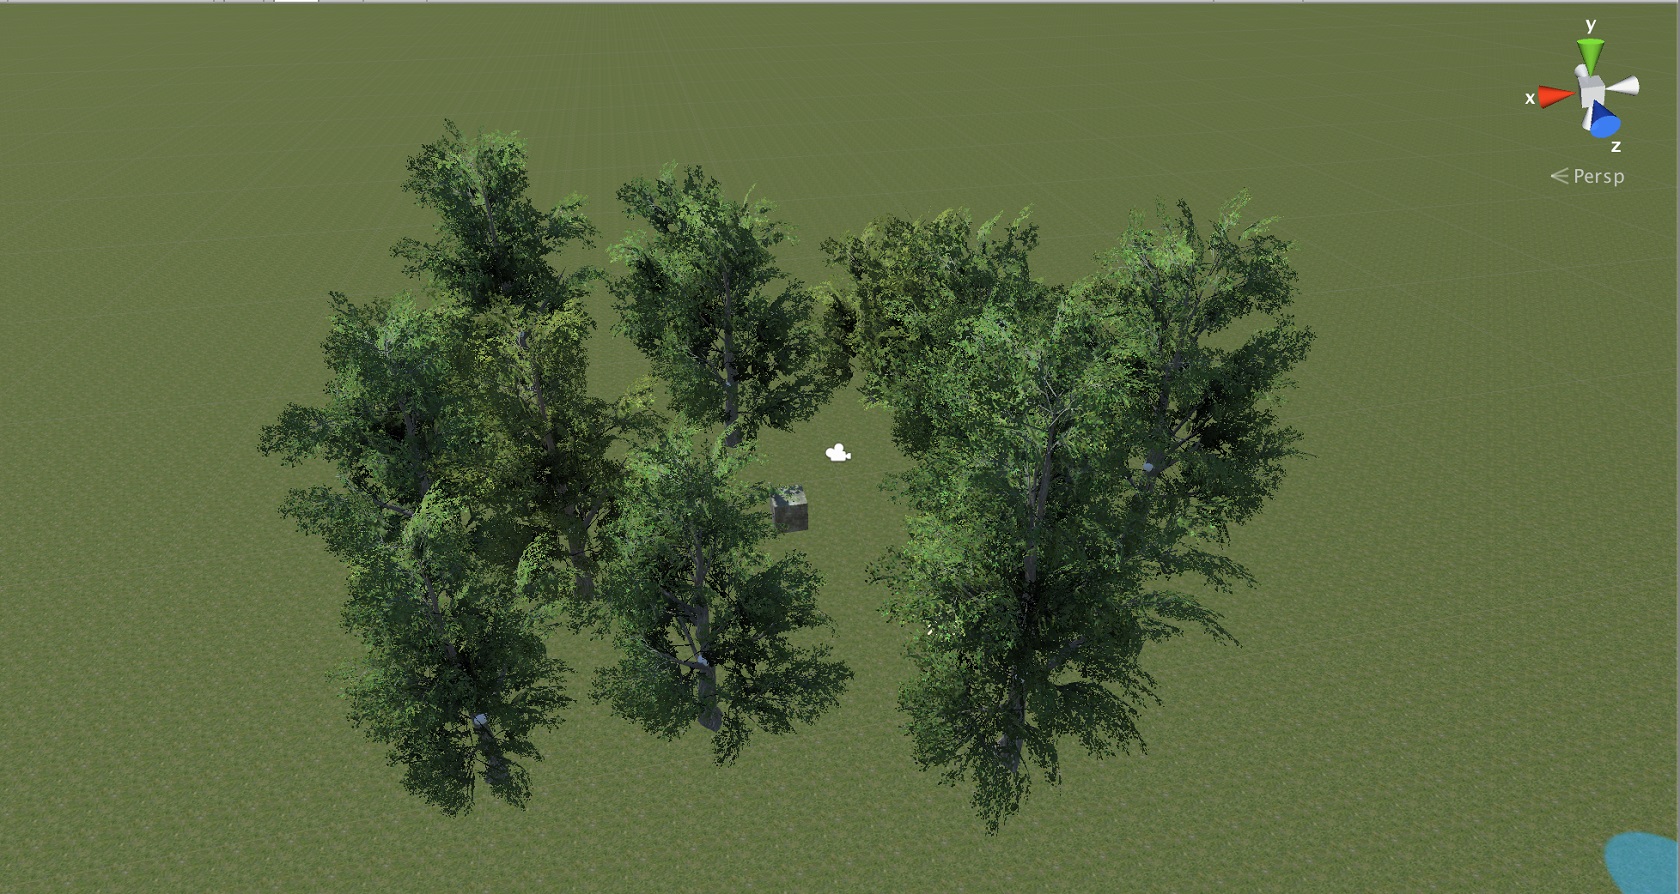
Click on your terrain. Select the Tree symbol. Click Edit Trees -> Add tree. The Add Tree window will ask for a Tree prefab. Click on the little round next to it. Select Broadleaf_Mobile. Click Add in the Add Tree window.
Adjust the brush size to 1. You can adjust the tree height the way you prefer it. Plant a few trees around your camera (5-10) to give your VR scene some atmosphere.
Now let’s add some hill or mountains to make it a real scene.
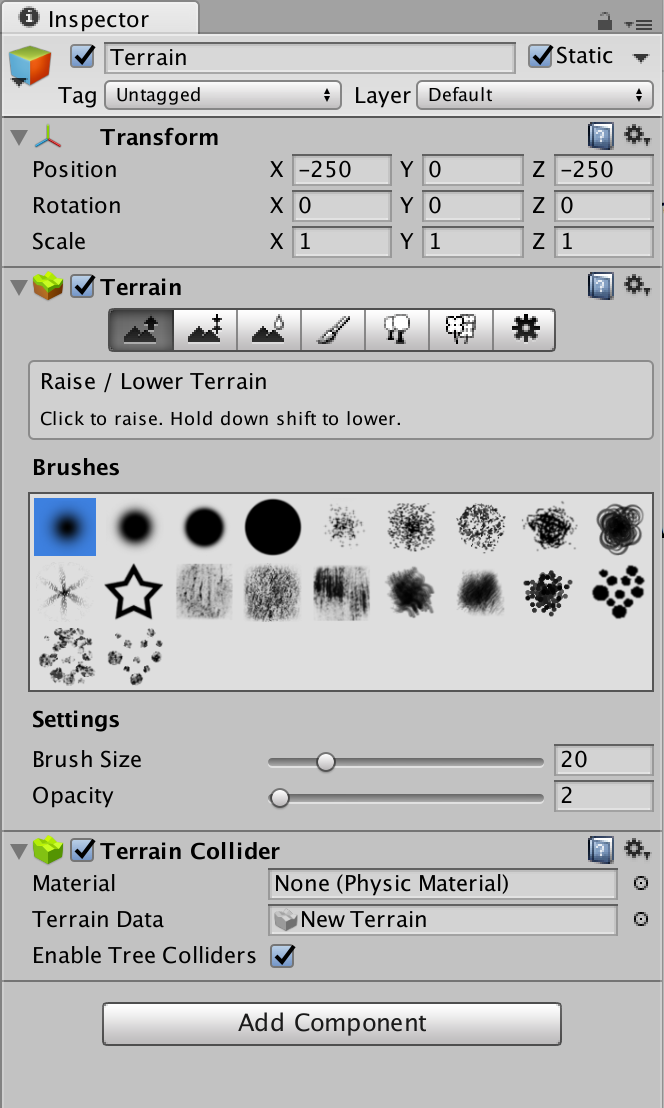
With your terrain still selected, choose the first symbol on the left. Choose a brush size of 20 and an opacity of 2.
Then, left click on your terrain to raise it. Be gentle with it, don’t hold the button down for too long. Go round your trees to create hills. Do so in a round motion of your cursor, so it creates smooth hills.
If you want, you can create higher up mountains in the background. You can also change the brush type to a more rough one to create pointy peaks. Now, here’s how you can make these mountains look rocky.

Select the brush again and click Edit Textures -> Add Texture. Select CliffAlbedoSpecular. Leave the default size value of 15 for x and y. Now, with the rock texture selected, choose a standard brush (the second one from the left for example). Set both the brush size and opacity to 20.
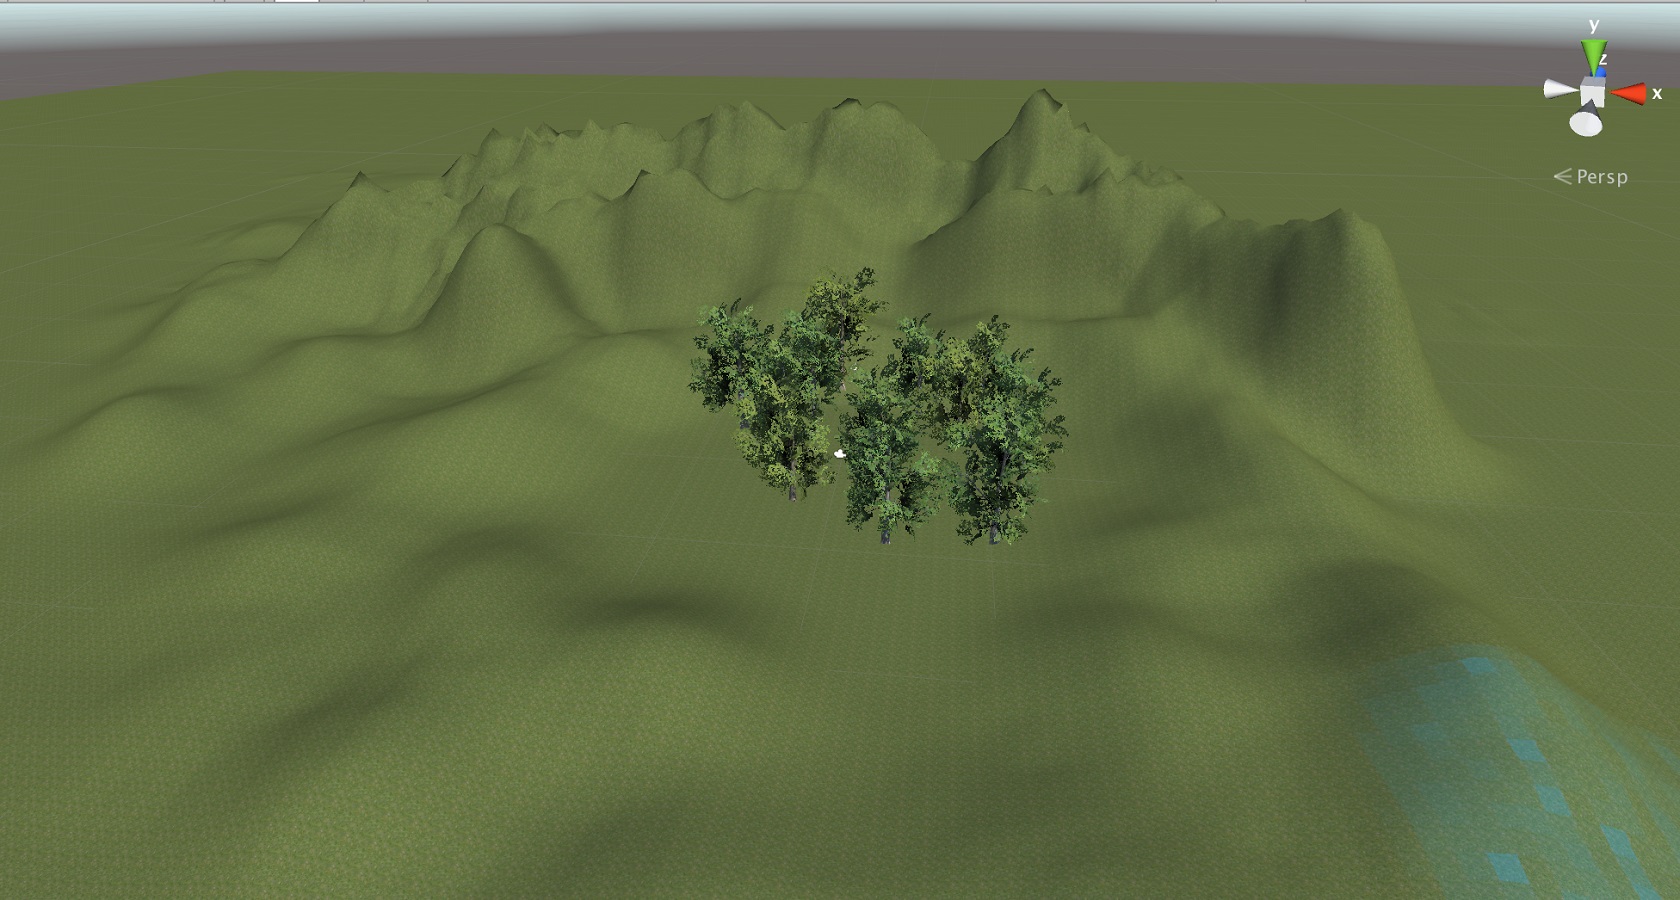
Paint over the mountains to turn grass into rocks.
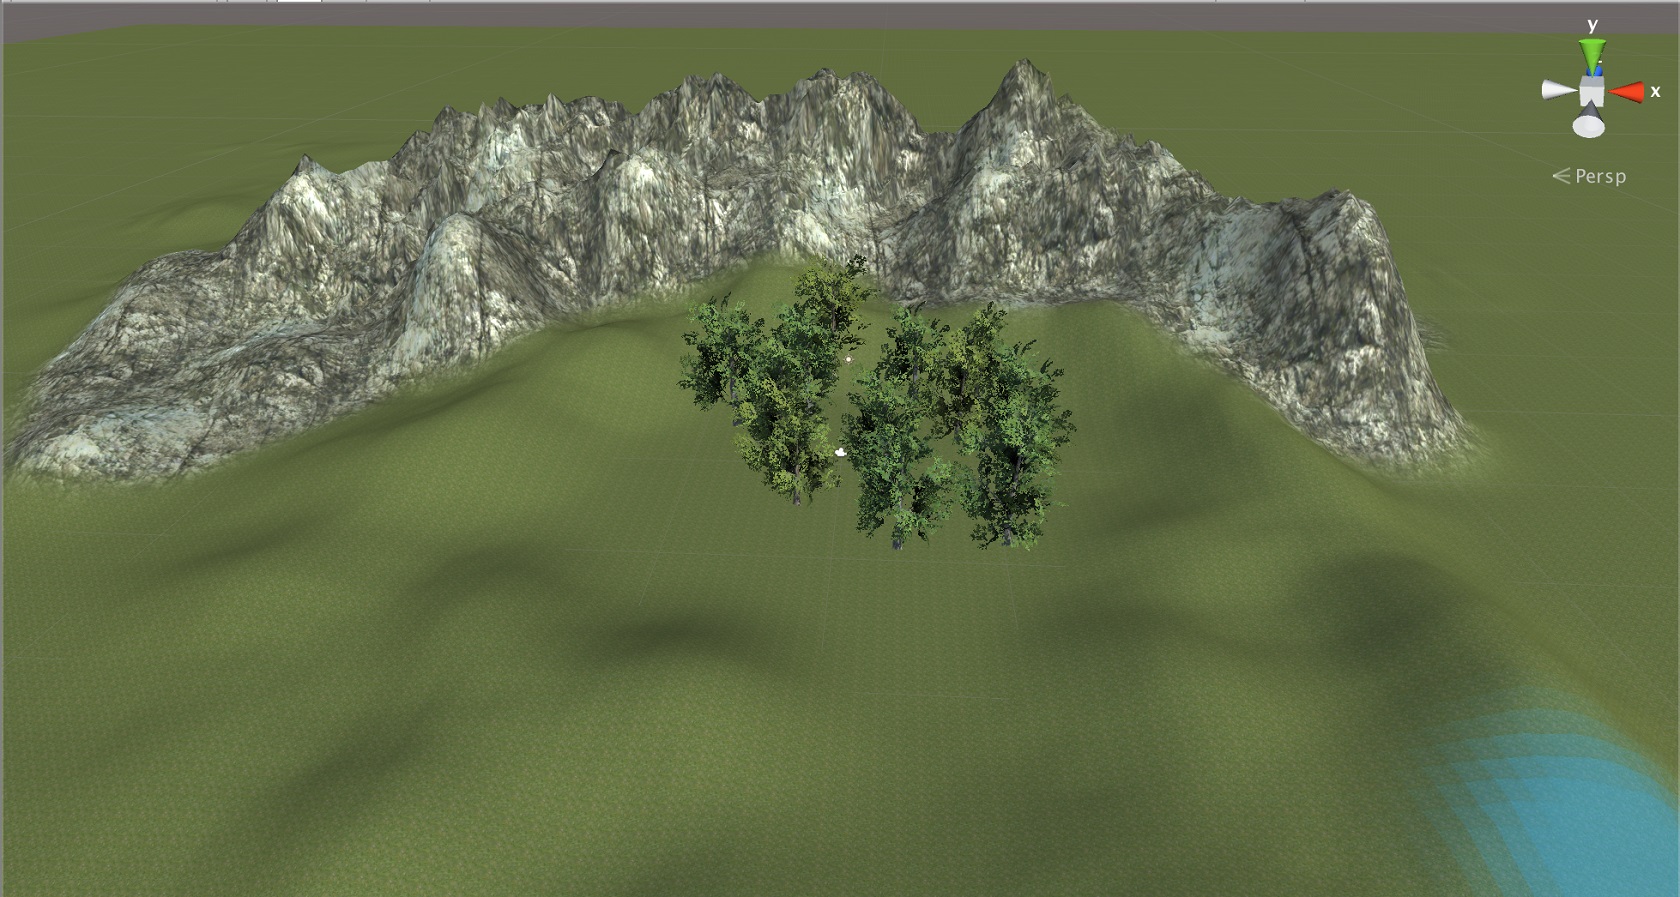
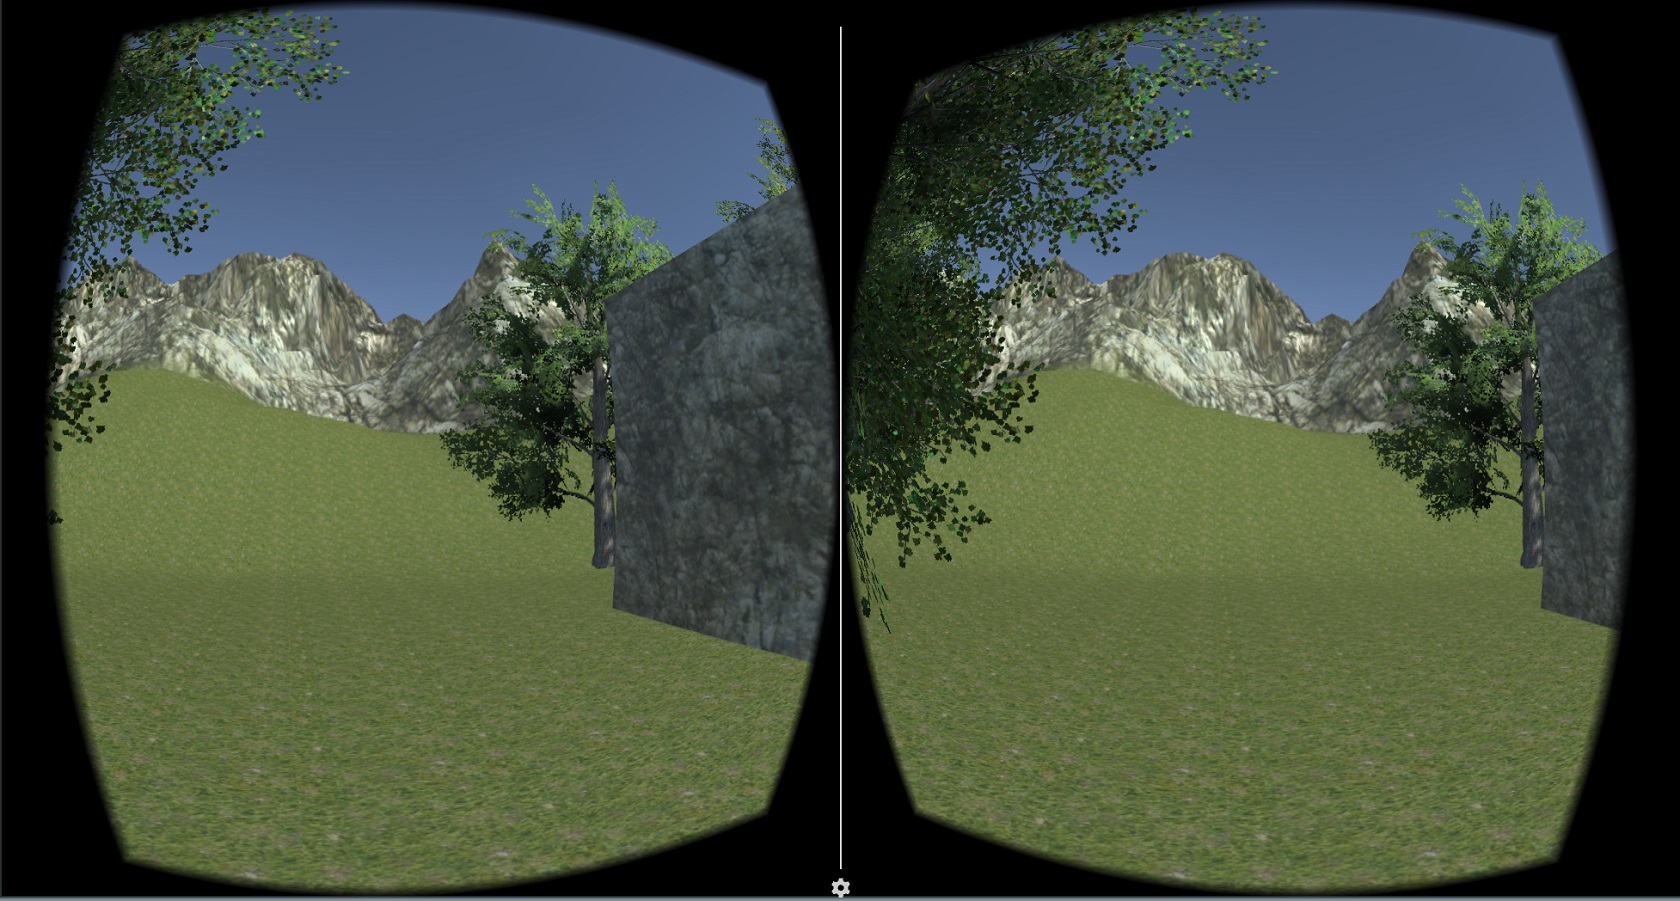
In the end, you’ll get a scene looking similar to this one:
When you click on play, you’ll notice our cube is far too small to be a house. Let’s scale it up.
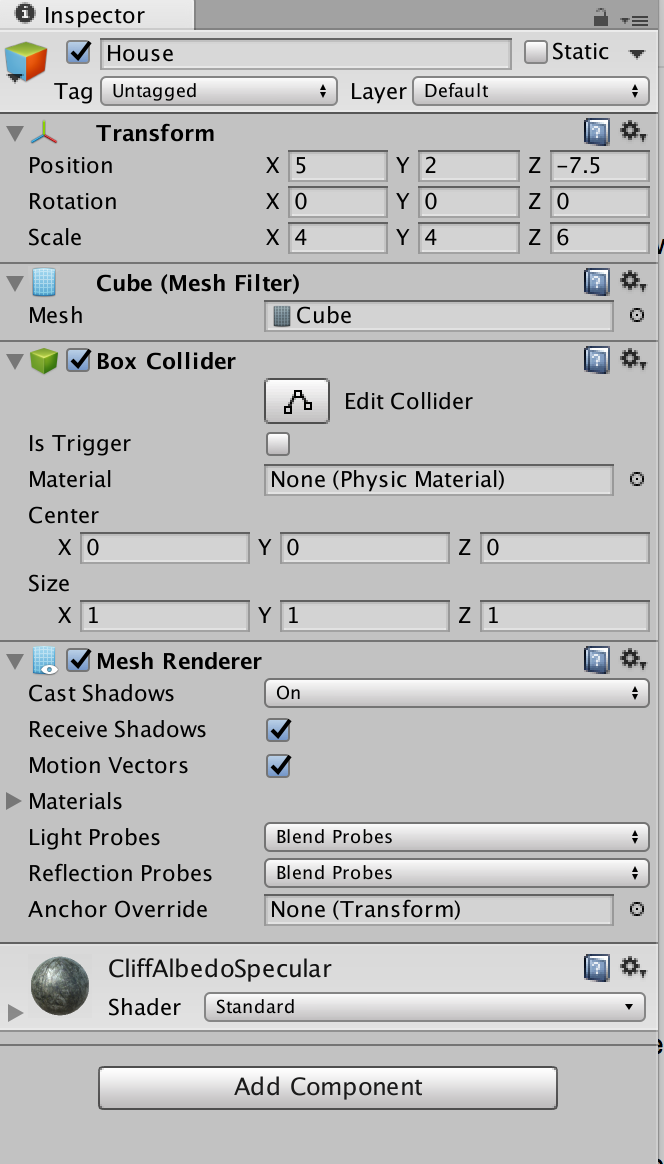
With the house selected, change its scale to 4, 4, 6. And move the position of your house to an adequate place (in my case 5 2 -7.5).
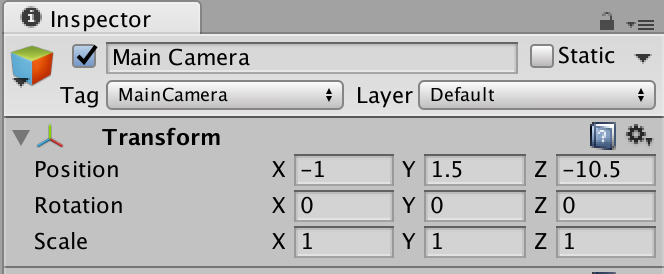
You might have noticed our camera was a bit low, at one meter from the ground. Let’s change that to a more realistic value. Select the camera, then adjust its Y position to 1.5.
Now’s the time to make adjustments to your terrain. Add or remove trees, create more hills, whatever makes you happy. Test your experience with the play button and update it until you’re happy with your scene. Make sure you don’t overload your scene, which will badly impact the final performance on your mobile device. Keep it lean.
Ready to build your first real VR experience? Just before you push the button, we’ve still got a couple of things to do. To ensure maximum performance…
Wanna get a high framerate?
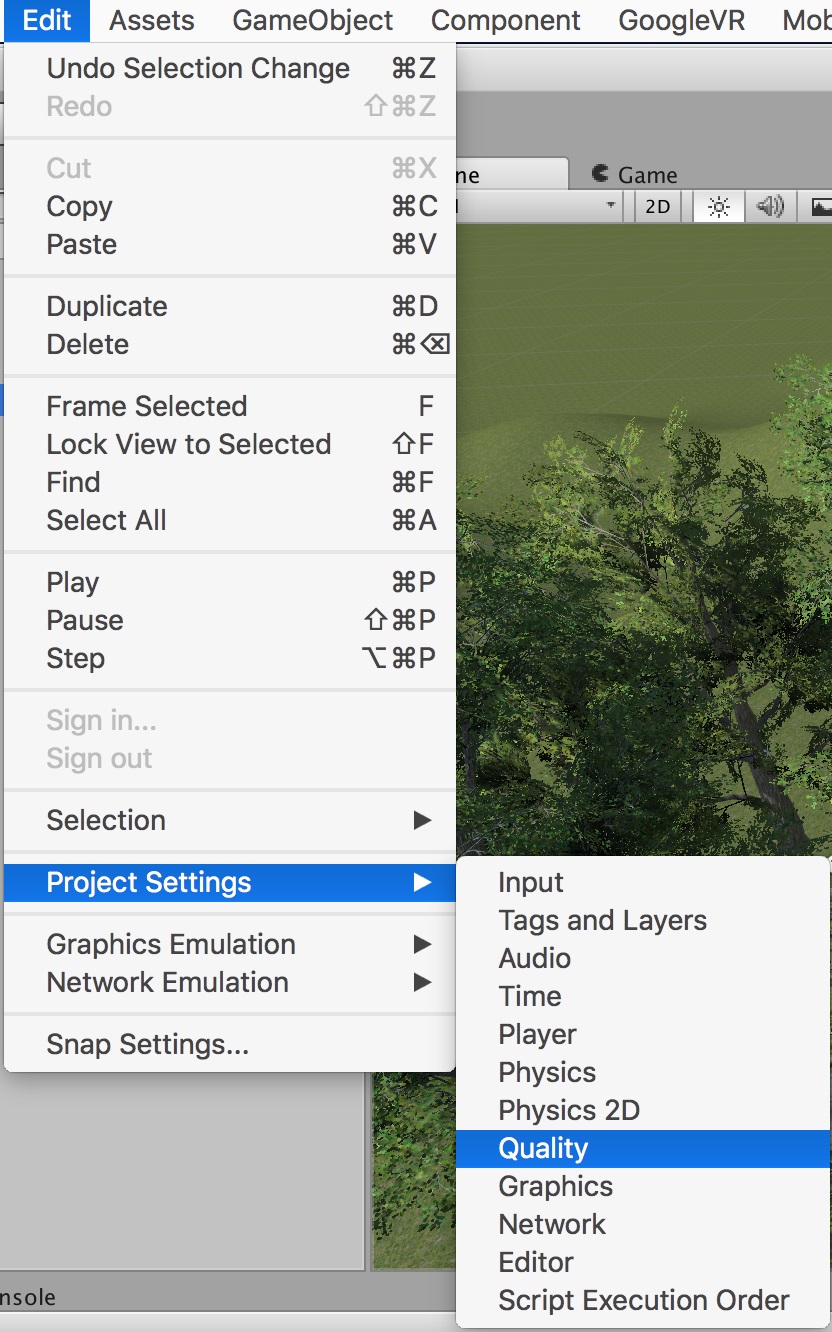
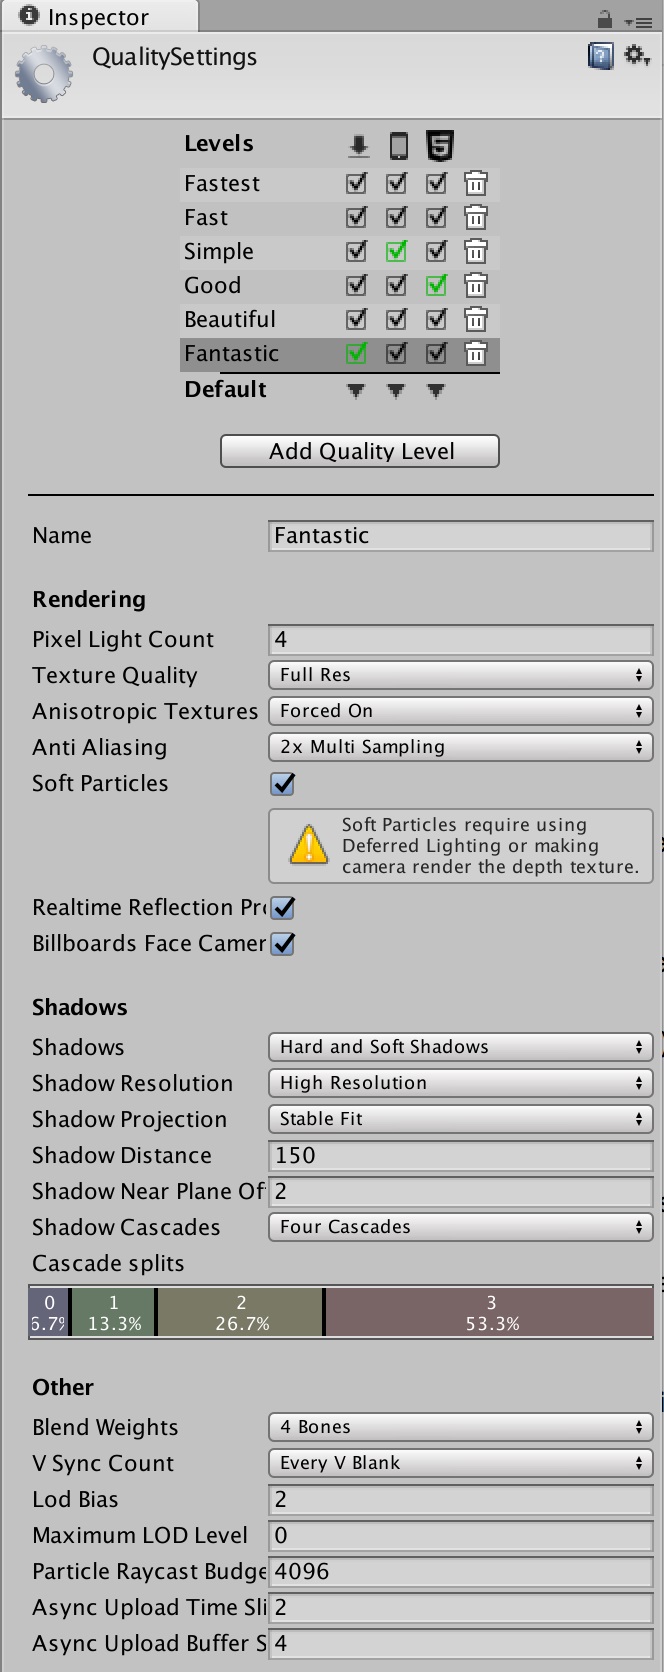
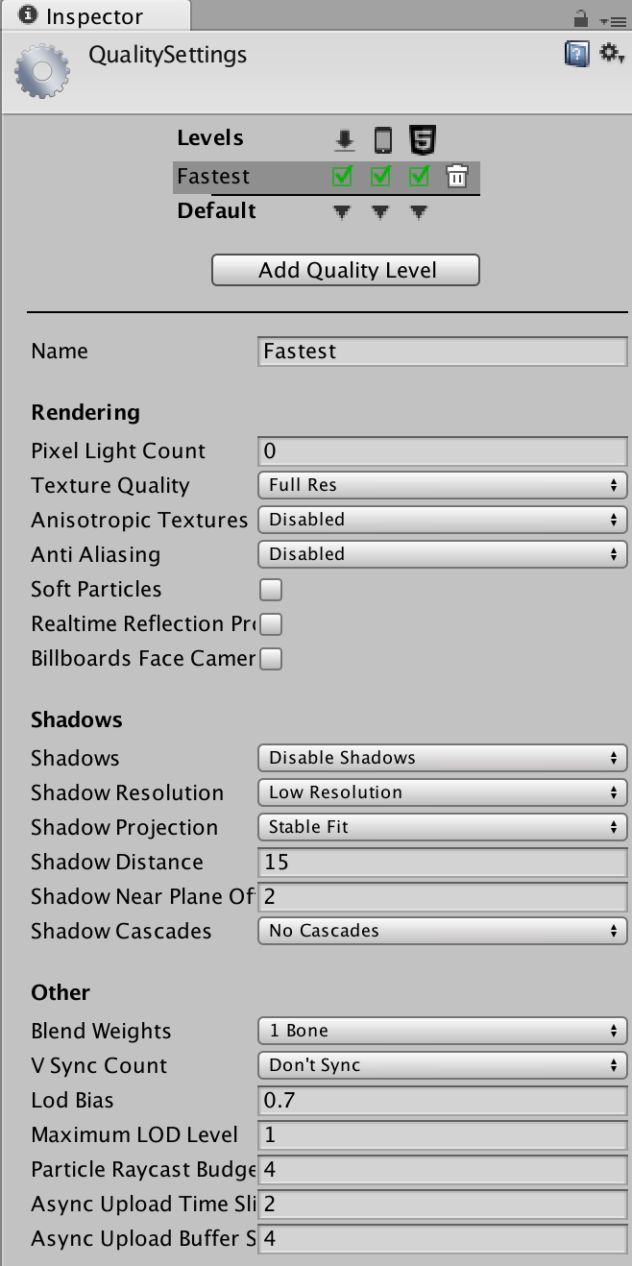
In the menus, choose Edit -> Project Settings -> Quality. At the top of the quality settings, remove every setting, apart from Fastest (click on the bin). For texture quality, select “Full Res”.
Then, adjust your LOD bias to a value between 0.6 and 1.0. This value depends on your scene. To check what’s right for you, look around your scene. If you see trees changing shape as you look around, increase the LOD bias value, until it stops happening.
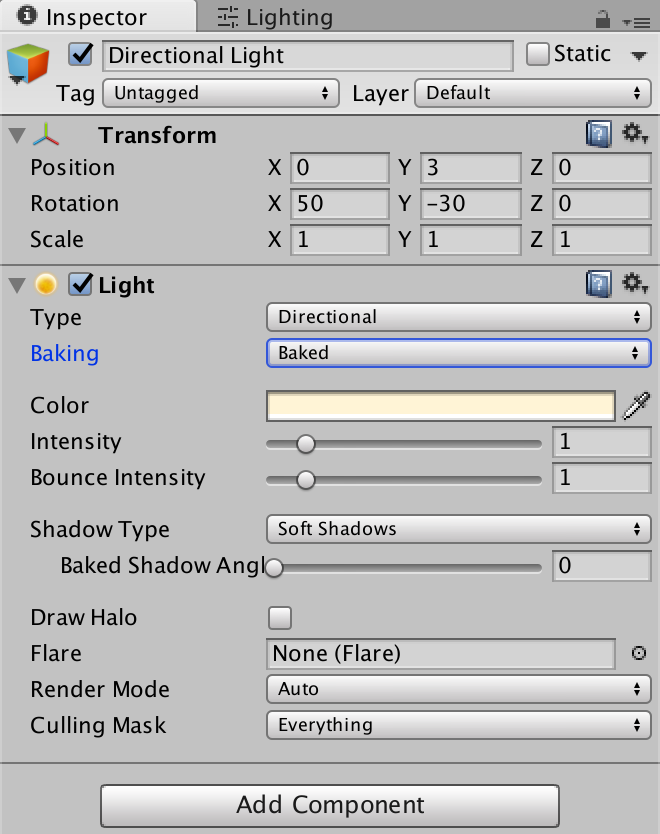
Now, click on the house and check the Static box in the Inspector (on the right hand side). Then, select the directional light. Under Baking, select “Baked”.

Right. Now you’re ready to build.
Build your app following the same flow you used to build the demo scene. Choose File -> Build Settings, click Add Open Scene. Then untick the GoogleVR Demo Scene.
Once the app is built, open XCode, if you’ve closed it. Select your project, follow setup instructions as before and click Run.
In the end, you’ll get your first real working app. Give yourself a pat on the back, you’re now a VR creator!
There’s still a lot to learn, but you’ve got the basics working. Depending on your phone and scene, you might notice the performance is not at the level it should be. If the framerate is too low, it can make you feel sick.
This would be a first issue to work on if you wanted to convert your friends to VR.
Also, if you wanted, you could now add an auto walk script so you can walk around the environment. You can find one on GitHub here.
To Infinity
Have you made it through and got your first VR app? If you did, that means you’ve told yourself you could do it and just did. Like my daughter.
Like most things in life, the hardest is to get started. Once you’ve done that part, you just figure things out on the way.
So, what are you going to build next? Share your plans in the comment section below.
Like What You've Read? Join My FREE Newsletter
I'll help you create your first VR experience and build a business around your passion
And when you join, you get a FREE guide: 8 Tools & Resources Every New VR Creator Needs, so you can start building your first product today
Follow Me
Recent Posts


Related Posts

Please share your comments